Deploy to Prod using a Git Workflow
Windmill integration with Git repositories makes it possible to adopt a robust development process for your Windmill scripts, flows and apps.
The integration with git works in three-folds:
- GitHub Action + CLI: upon any commit to a particular branch, the GitHub action will run the
wmillCLI and push to a Windmill workspace this works using the CLI doingwmill sync push(free & open source) - Git Sync (Workspace mode): Windmill automatically committing to a git repository upon any deployment to a workspace, this works using the CLI doing
wmill sync pull(Cloud and Enterprise Self-Hosted). Having it commit back to Windmill has 2 benefits:
- It ensures that any automatically created metadata files are wrote-back (in case you pushed a script without its metadata for instance).
- It ensures that any modification done in the UI is kept in sync with the git repository and guarantees a bi-sync between the repo and the UI.
- Git Sync (Item mode): Windmill automatically creates a branch specific to that item (and whose name is derived from that item) that targets the branch set in the git sync settings, upon any change to any items, be it from the UI or from git (Cloud and Enterprise Self-Hosted). This should be coupled with a GitHub action that automatically create a PR when a branch is created. This PR can then be reviewed and merged. Upon being merged to the prod branch, a GitHub action as described in 1. would then deploy it to the prod branch.
Once everything is set up, the process is as follows:
- Users iterate and make their changes in the "staging" Windmill workspace UI or in the git staging branch directly.
- Every time a Windmill App, Flow or Script is deployed to that workspace (via Windmill's UI or through the GitHub action that deploys to staging upon any change), Windmill automatically sync it back to the repo on the "staging" branch (Git Sync - Workspace mode) and also create a branch that targets prod and keep it in sync with any new changes (Git Sync - Item mode)
- On every new branch created, PRs are automatically created via a GitHub Action. Approved GitHub users can review and merge those PRs.
- Every time a PR is merged, another GitHub Action automatically deploys the change to a "production" Windmill workspace.
Note that although the CLI is used by both the GitHub Action and the Git Sync, the CLI does not need to be used directly by any users and everything happen behind the scene in an automated way.
This gives the flexibility to fully test new Windmill scripts, flows and apps, while having them version-controlled and deployed in an automated way to the production environment.
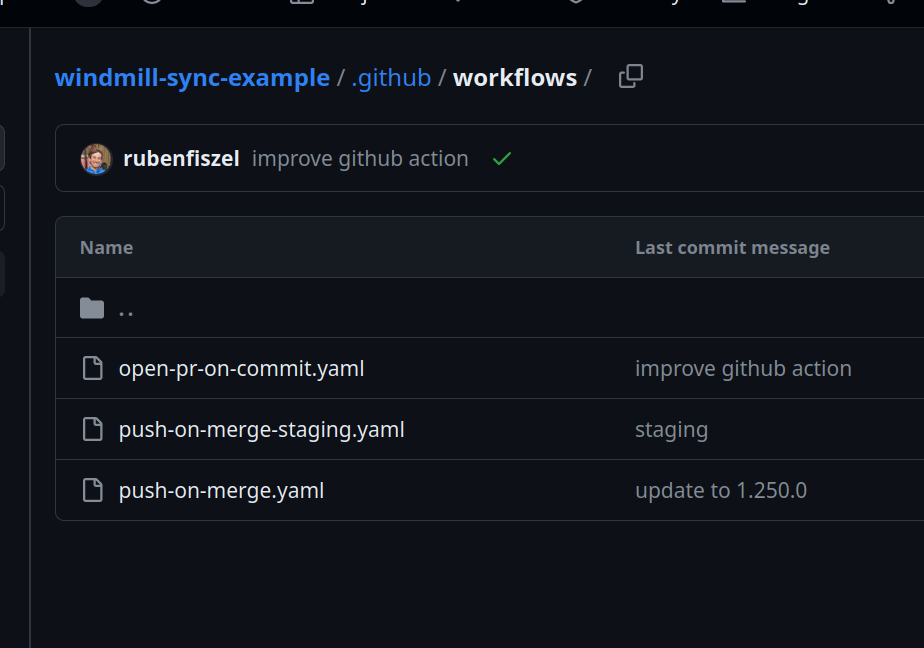
Check out the windmill-sync-example repository as an illustration of this process.
This process can be used in particular for local development with a solid setup:

More details at:
Git Sync
Deploying to a prod workspace using git requires the Git Sync feature, which is is a Cloud plans and Self-Hosted Enterprise Edition-only feature.
From the workspace settings, you can set a git_repository resource on which the workspace will automatically commit and push scripts, flows and apps to the repository on each deploy.
Setup the full Git workflow
Note: this is the detailed setup steps for a GitHub repository. It will need to be adapted for GitLab.
The Video below show a simplified setup, see the steps below it for the full setup.
If you are not using the Enterprise Edition (EE) version of Windmill, you can still follow the parts of this guide that do not involve Git Sync.
The guide covers a staging and prod setup. To add an additional dev environment, simply consider staging to be the target of the dev workspace and prod to be the target of the staging workspace..
What about variables, resources and secrets?
The CLI is able to sync variables, resources and secrets as well. However, everywhere the CLI is used here, it it set with the flags --skip-variables --skip-secrets --skip-resources to avoid syncing them. This is because variables, resources and secrets should have values that are specific to each environment. For instance, a resource named f/myproject/myimportantdb should have a different value in staging and prod. This is why they are not synced and should be set manually in each environment. You can however if you prefer, manually sync those. Do note that secrets have an additional layer of encryption and are by default exported in their encrypted form whose decryption key is workspace specific. To sync them between workspace, use --plain-secrets to export them in plain text.
GitHub repository setup
First, the GitHub repo needs to be set up and Windmill needs to be able to commit to it.
- Create a GitHub repository.
- Initialize it by pulling the content of your workspace:
#first github-sync-example is the local name of the workspace (can be anything), second is the workspace id (need to be exact), third is the url of your instance
wmill workspace add  github-sync-example-staging github-sync-example-staging https://app.windmill.dev/
echo 'includes: ["f/**"]' > wmill.yaml
wmill sync pull --skip-variables --skip-secrets --skip-resources
git add -A
git commit -m 'Initial commit'
git push - Create a branch named
stagingand push it to the repo. - Generate a GitHub token with write permission to this repository. This is necessary for Windmill to push commits to the repo every time a change is made to the staging workspace.
- In the repository Settings > Actions > General, tick the Allow GitHub Actions to create and approve pull requests. This is necessary for the GitHub Action automatically creating PRs when Windmill commits a change.
- From Windmill, create a token under User settings > Token and save it as a secret named
WMILL_TOKENin the repo Settings > "Secret and Variable" > "Actions". This is necessary for Windmill to push to the production workspace.
GitHub Actions setup
3 actions are needed.
-
The first one to automatically create a PR when Windmill commits a change after a user deployed a script/flow/app in the staging workspace. The workflow file is available in the example repo. All branches created by Windmill will have a
wm_deploy/prefix, which is handy to trigger this action only when a branch matching this pattern is created. -
The second one to automatically push the content of the repo to the Windmill prod workspace when a PR is merged. The workflow file is available in the example repo. This action uses the wmill itself with
wmill sync push. For this action to work, you need to set the following secrets in the repo Settings > "Secret and Variable" > "Actions":WMILL_TOKEN: the token generated previously in Windmill
2 other variables need to be set in the GitHub action workflow file:
WMILL_WORKSPACE: the name of the workspaceWMILL_URL: the base URL of the Windmill instance (e.g.https://app.windmill.dev/)
-
Copy the previous GitHub action/workflow file but now set the
WMILL_WORKSPACEvariable to the id of the staging workspace and theWMILL_URLvariable to the base URL of the Windmill instance if different than the one for prod. Also changes the trigger to listen to the branches: 'staging'.
Here is the automation for GitHub Actions, but it is simple enough to easily be adapted for other CIs.
name: 'Push main to Windmill workspace'
on:
  workflow_dispatch:
  push:
    branches:
      - 'main'
    # if the Windmill workspace is persisted in a subfolder of this repos, you can add the following to avoid pushing to Windmill when there's no change
    # paths:
    #   - wm/**

env:
  WMILL_URL: https://app.windmill.dev/
  WMILL_WORKSPACE: github-sync-example-prod

jobs:
  sync:
    environment: windmill
    runs-on: 'ubuntu-latest'
    steps:
      - name: Checkout
        uses: actions/checkout@v3

      - name: Setup Deno
        uses: denoland/setup-deno@v1
        with:
          deno-version: vx.x.x

      # (push will pull first to detect conflicts and only push actual changes)
      - name: Push changes
        run: |
          deno run --unstable -A  https://deno.land/x/[email protected]/main.ts workspace add __automation ${{ env.WMILL_WORKSPACE }} ${{ env.WMILL_URL }} --token ${{ secrets.WMILL_TOKEN }}
          deno run --unstable -A  https://deno.land/x/[email protected]/main.ts sync push --yes --skip-variables --skip-secrets --skip-resources
The automation installs deno and then invokes 2 commands of the wmill CLI that were already covered above. It adds the workspace and pushes the changes to it. You could also use the --stateful sync format, not to ignore variables, secrets and resources to avoid committing secrets to the repository. Feel free to adapt this to your use case.
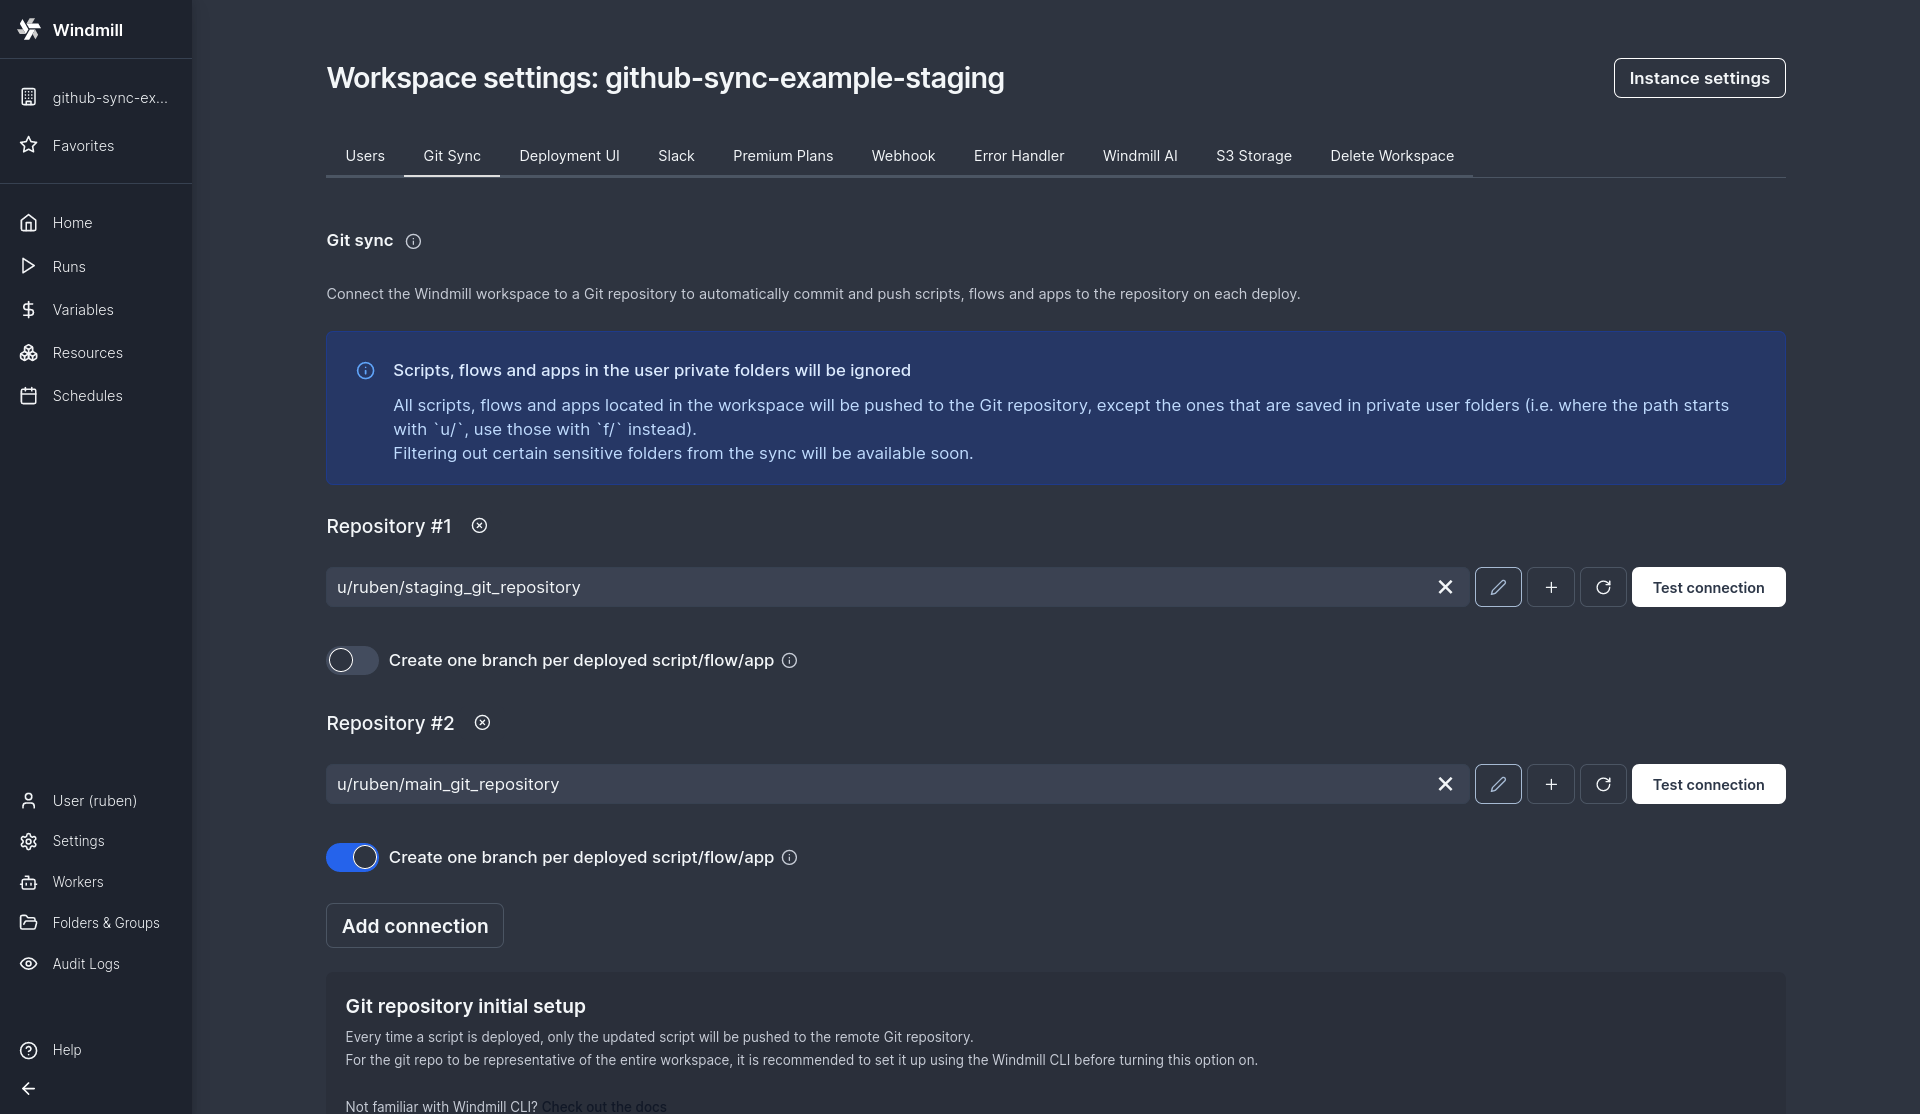
Windmill GitHub Sync setup
-
staging workspace:
- In Windmill, create (by clicking on the + icon next to the resource picker) a git_repository resource pointing to the GitHub repository and containing the token generated previously. You URL should be
https://[USERNAME]:[TOKEN]@github.com/[ORG|USER]/[REPO_NAME].git. Set the branch to staging. - Create a second git_repository resource pointing to the same GitHub repository but this time set branch to main
- Under the second git repository resource (the one pointing to prod), the one pointing to main, toggle: " Create one branch per deployed script/flow/app"
- In Windmill, create (by clicking on the + icon next to the resource picker) a git_repository resource pointing to the GitHub repository and containing the token generated previously. You URL should be
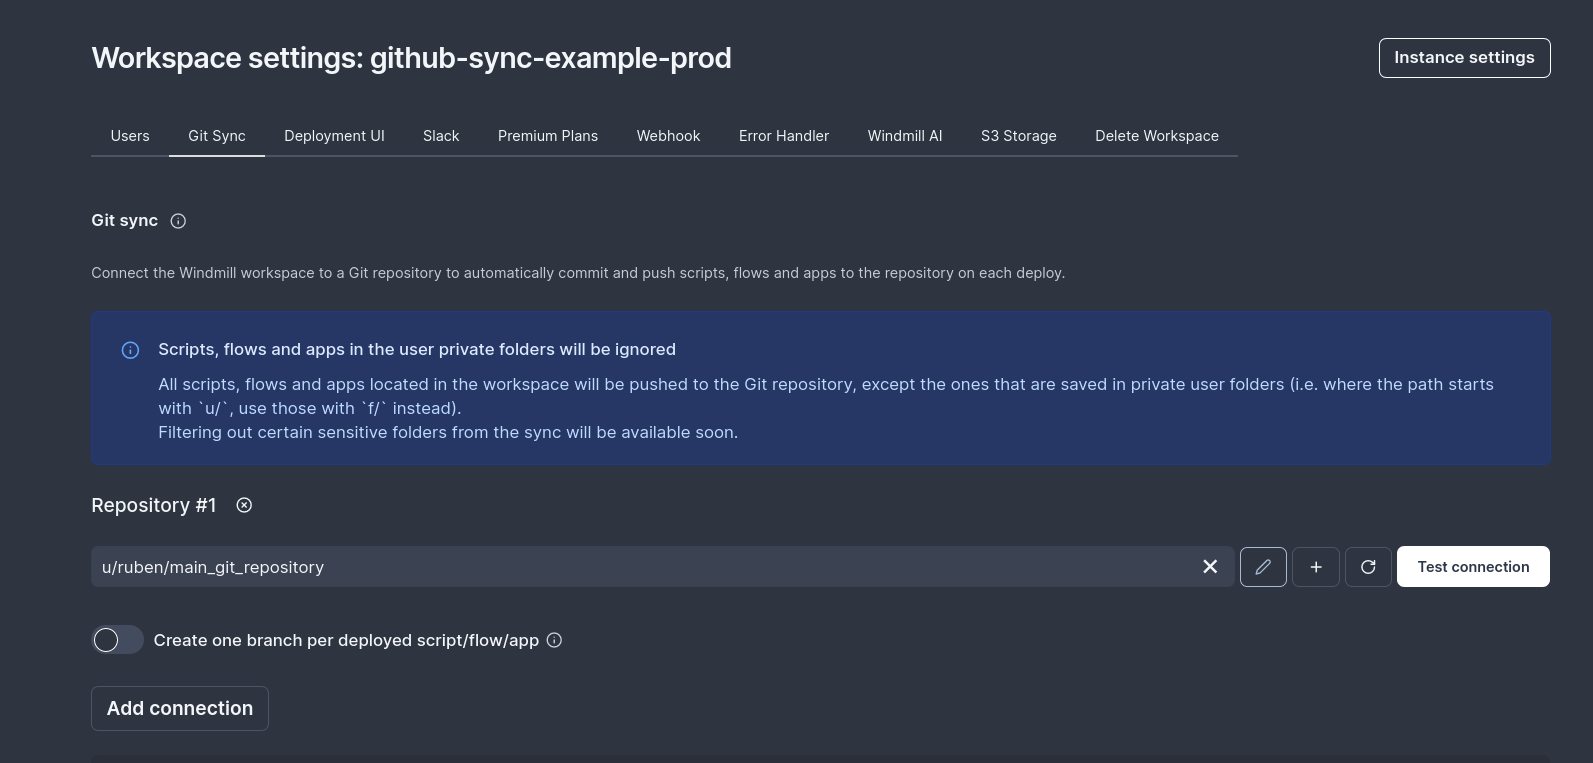
-
prod workspace
- In Windmill, create a git_repository resource pointing to the GitHub repository and containing the token generated previously. You URL should be
https://[USERNAME]:[TOKEN]@github.com/[ORG|USER]/[REPO_NAME].git. Set the branch to main
- In Windmill, create a git_repository resource pointing to the GitHub repository and containing the token generated previously. You URL should be
See our dedicated page here
Testing
- To verify that all is working correctly, push a change to your staging branch in git (for instance copy a script with a slightly different path)
- Verify in the GitHub action run that the sync push has been able to push the change to the staging workspace
- Go to your staging workspace in Windmill, the new script should be there
- go to the runs page, toggle the "Sync" kind of jobs. You should see at least 2 jobs, one to push back your change to the staging workspace (no-op), and one to create a branch that targets the main branch (the one that will be merged)
- Now in your repo, you should see a new branch named
wm_deploy/[WORKSPACE_NAME]/[SCRIPT_PATH](for instancewm_deploy/staging/f/example/script) - Merge that branch, now the changes should trigger the "Deploy to prod" GitHub action in the main branch
You can also test doing a change in the staging workspace directly in the UI. Since this setup is bidirectional, it will also trigger the GitHub action to create a PR but also update your staging branch.