Flows Quickstart
The present document will introduce you to Flows and how to build your first one.
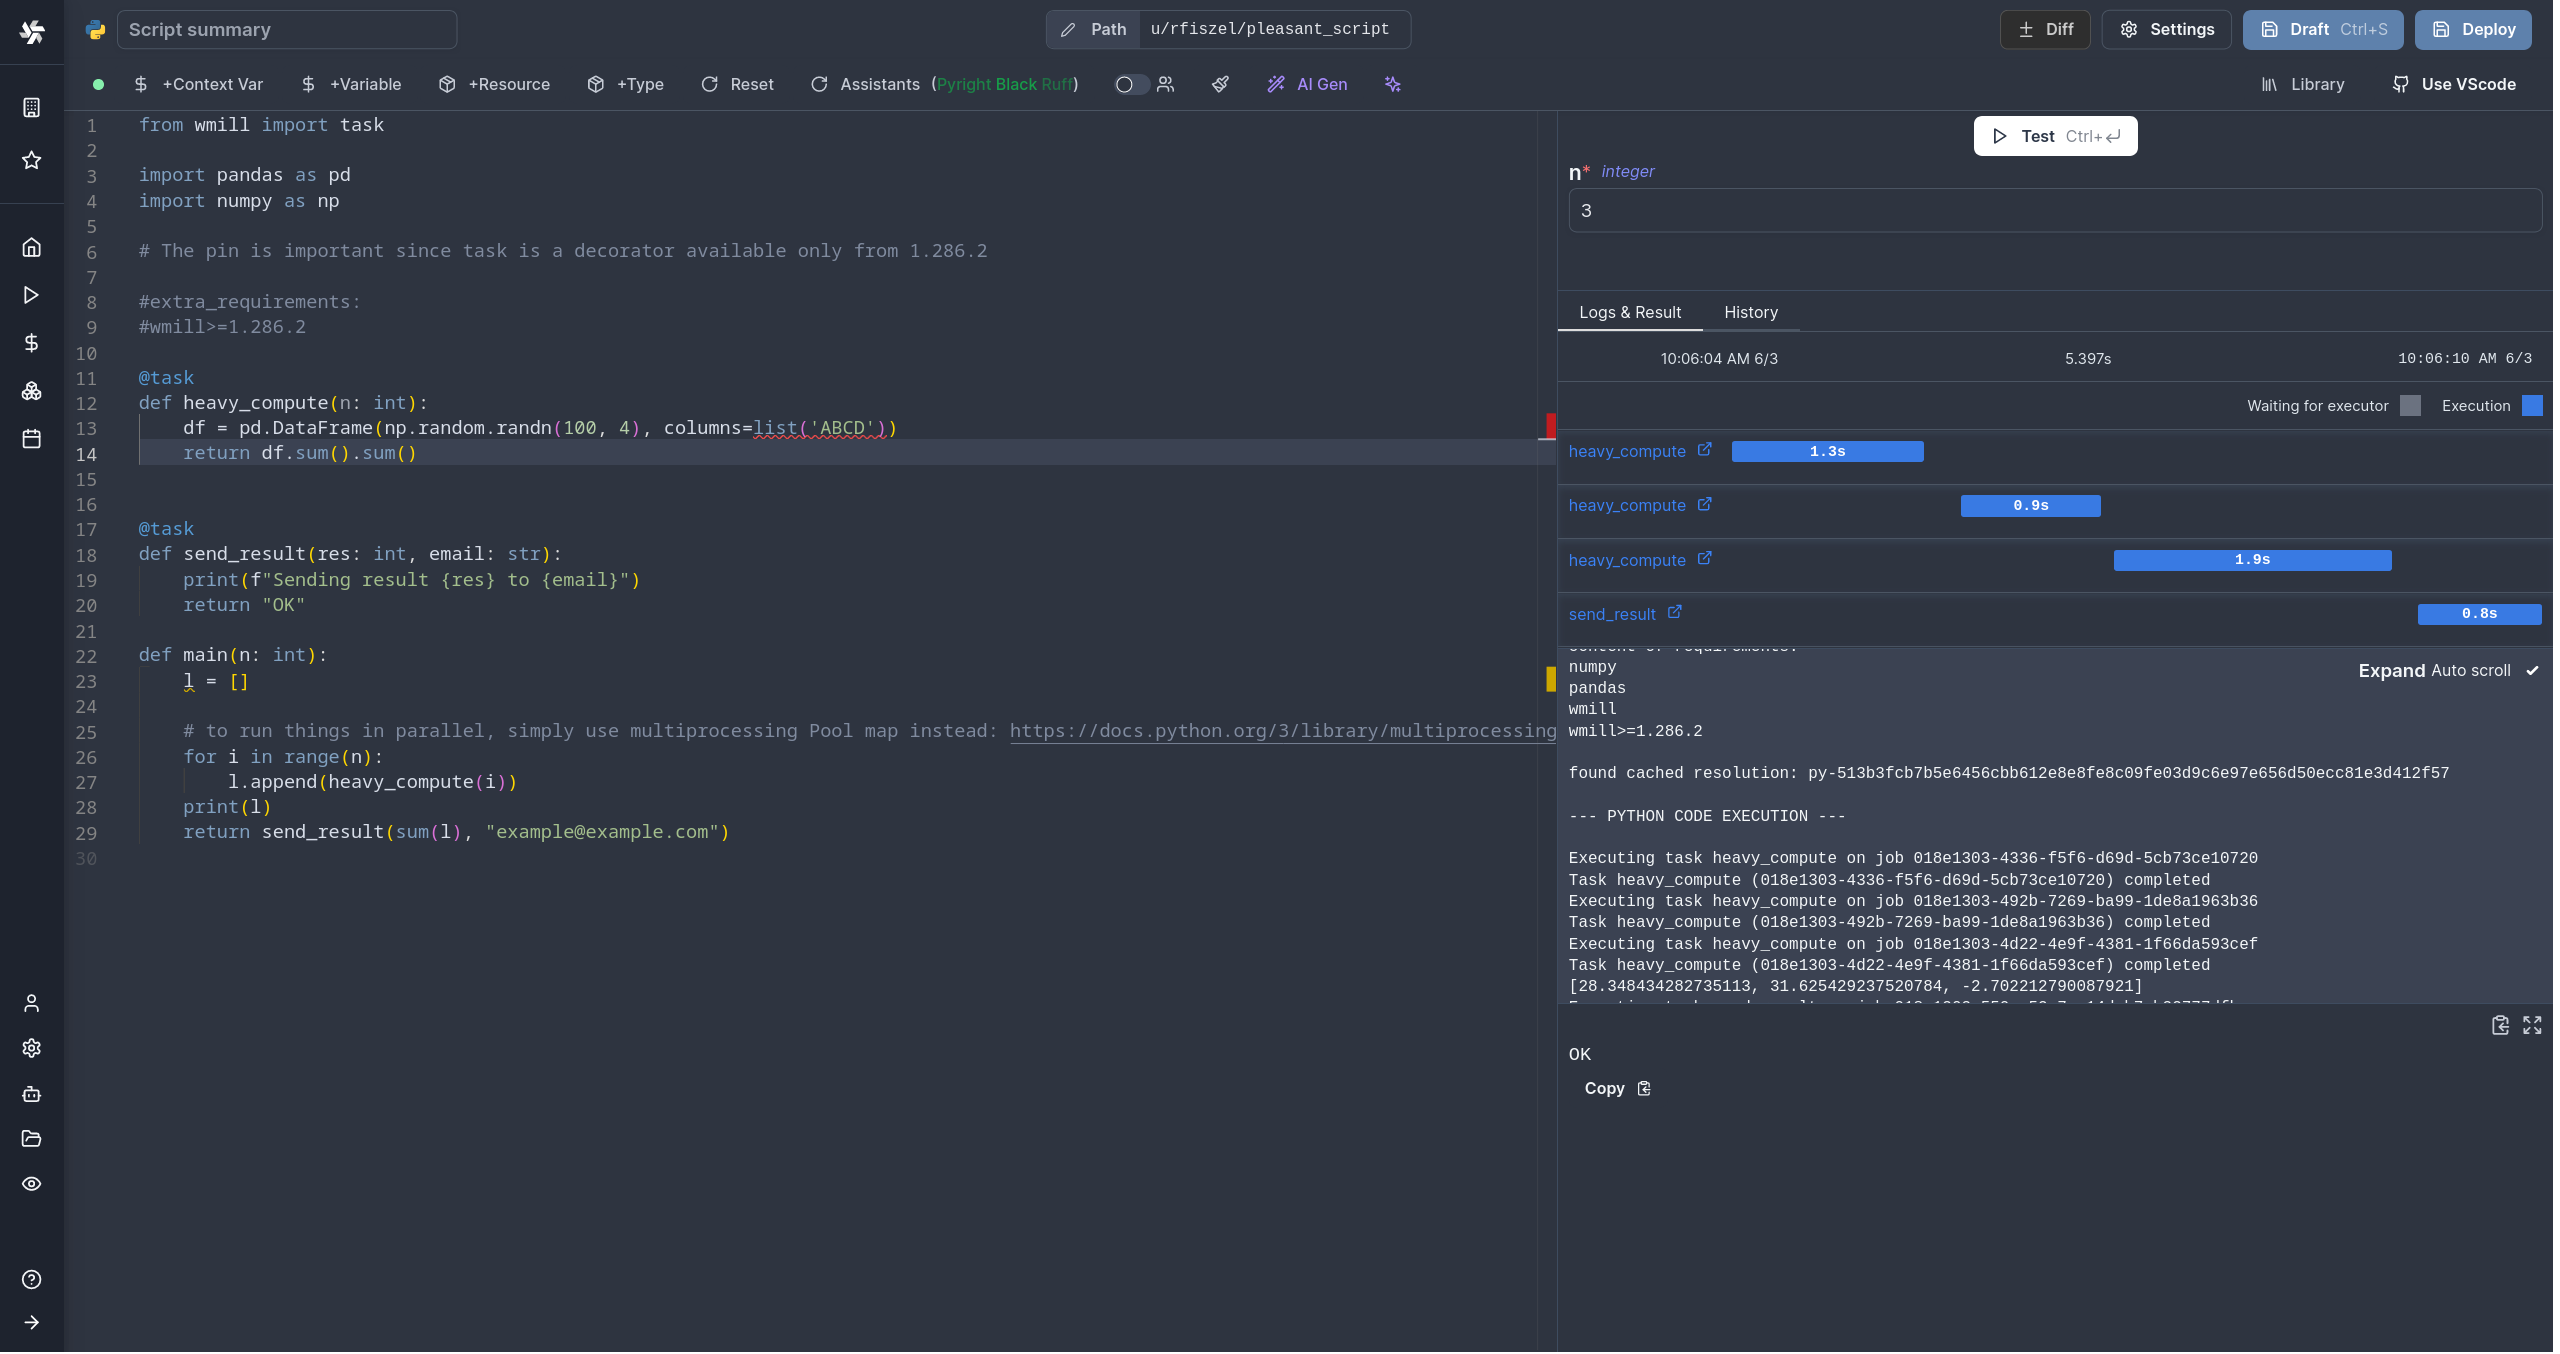
Here is an example of a simple flow built with Windmill.
Have in mind that in Windmill, Scripts are at the basis of Flows and Apps. To sum up roughly, workflows are state machines represented as DAGs (Directed Acyclic Graphs) to compose scripts together. To learn more about scripts, check the Script Quickstart. You will not necessarily have to re-build each script as you can reuse them from your workspace or from the Hub.
Those workflows can run for-loops, branches (parralellizable) suspend themselves until a timeout or receiving events such as webhooks or approvals. They can be scheduled very frequently and check for new external items to process (what we call "Trigger" script).
The overhead and coldstart between each step is about 20ms, which is faster than any other orchestration engine, by a large margin.
To create your first workflow, you could also pick one from our Hub and fork it. Here, we're going to build our own flow from scratch, step by step.
From Windmill, click on + Flow, and let's get started!
Follow our detailed section on the Flow Editor for more information.
Settings
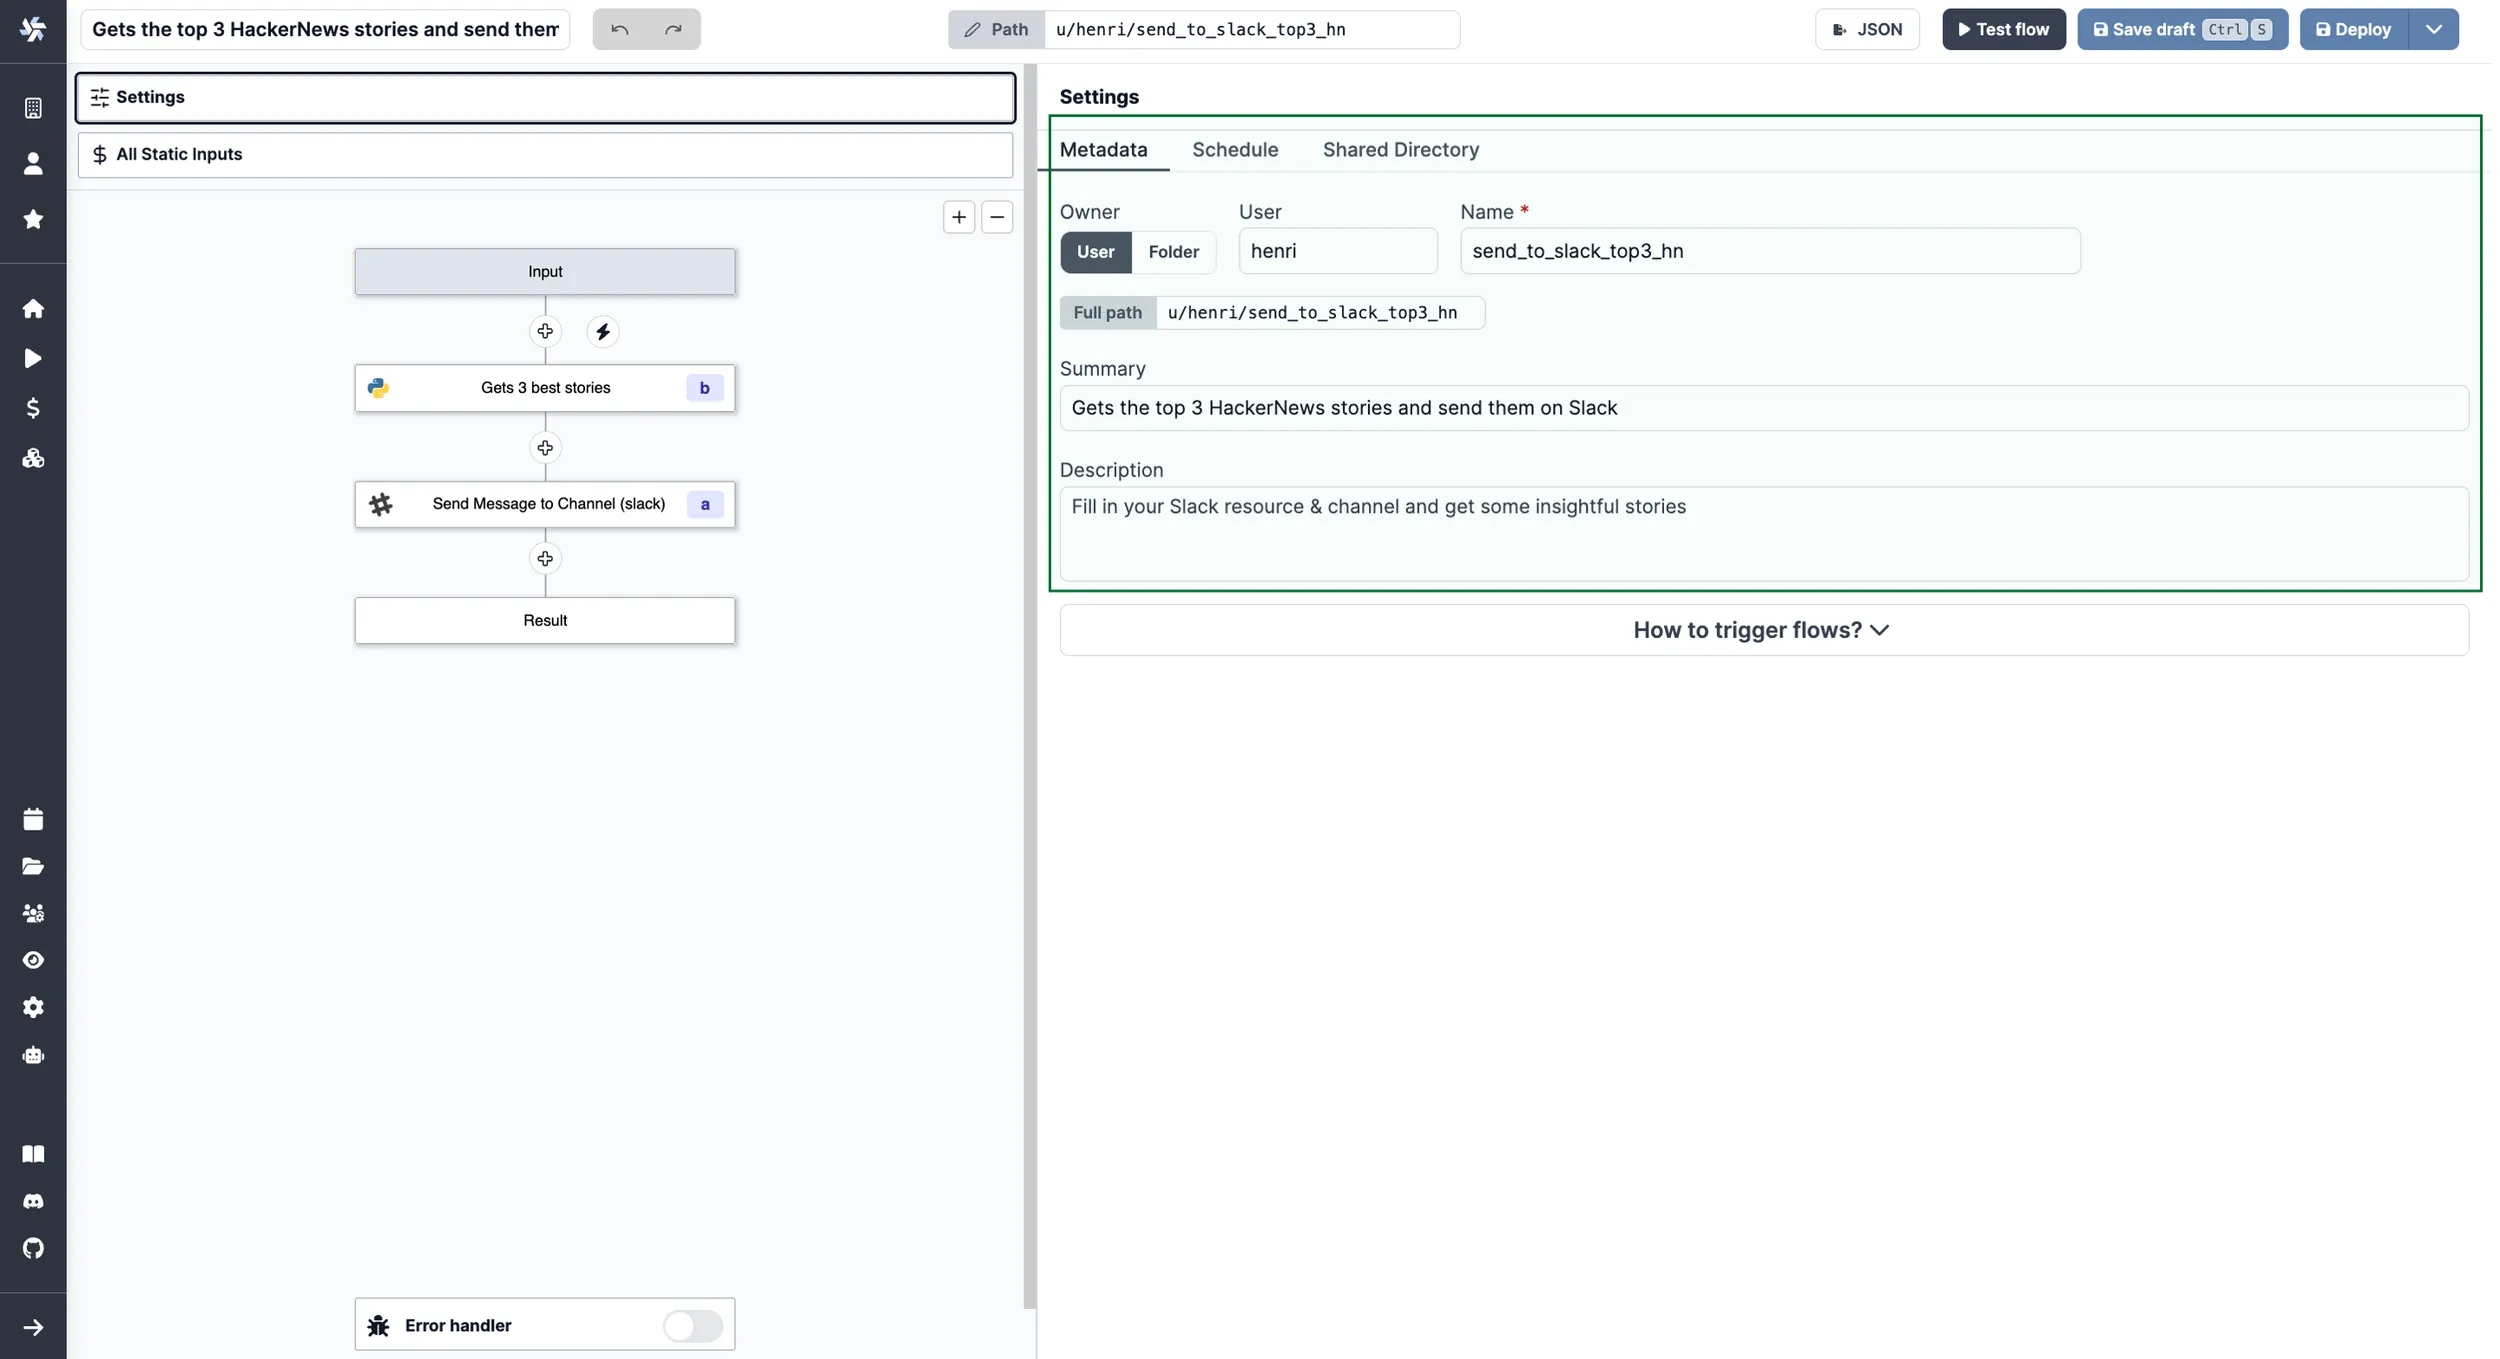
Metadata
The first thing you'll see is the Metadata menu. From there, you can set the permissions of the workflow: User (by default, you), and Folder (referring to read and/or write groups).
Also, you can give succinctly a Name, a Summary and a Description to your flow. Those are supposed to be explicit, we recommend you to give context and make them as self-explanatory as possible.
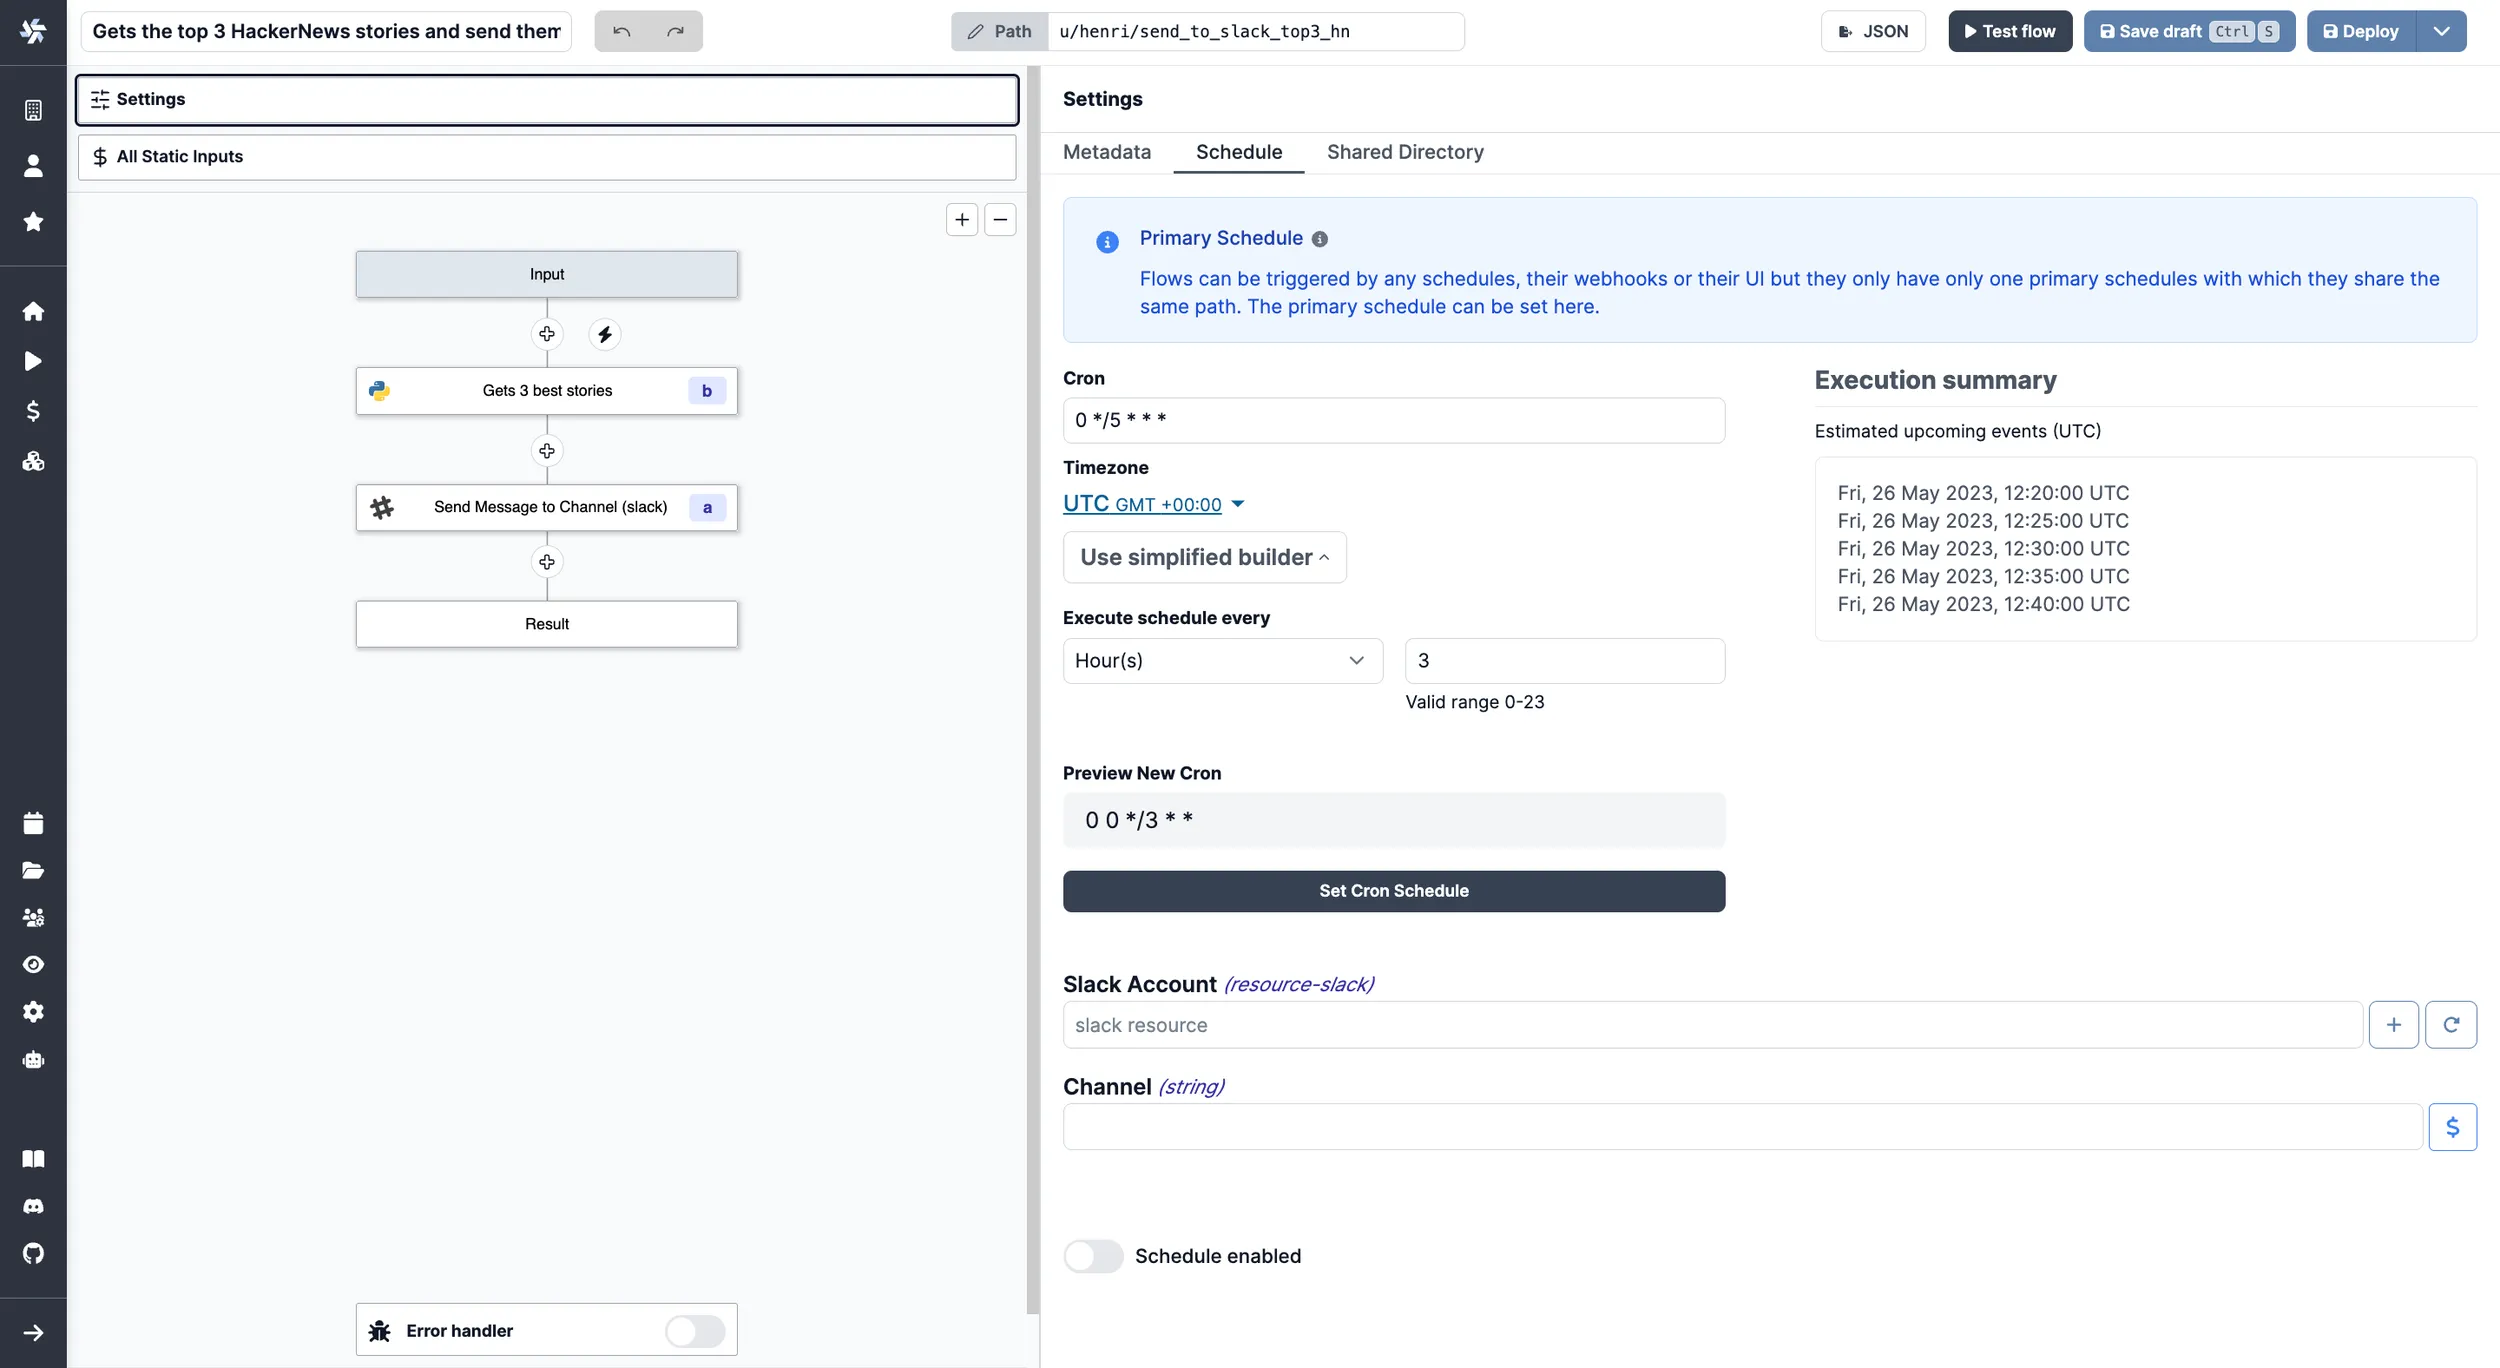
Schedule
On another tab, you can configure a Schedule to trigger your flow. Flows can be triggered by any schedules, their webhooks or their UI but they only have only one primary schedule with which they share the same path. This menu is where you set the primary schedule with CRON. The default schedule is none.
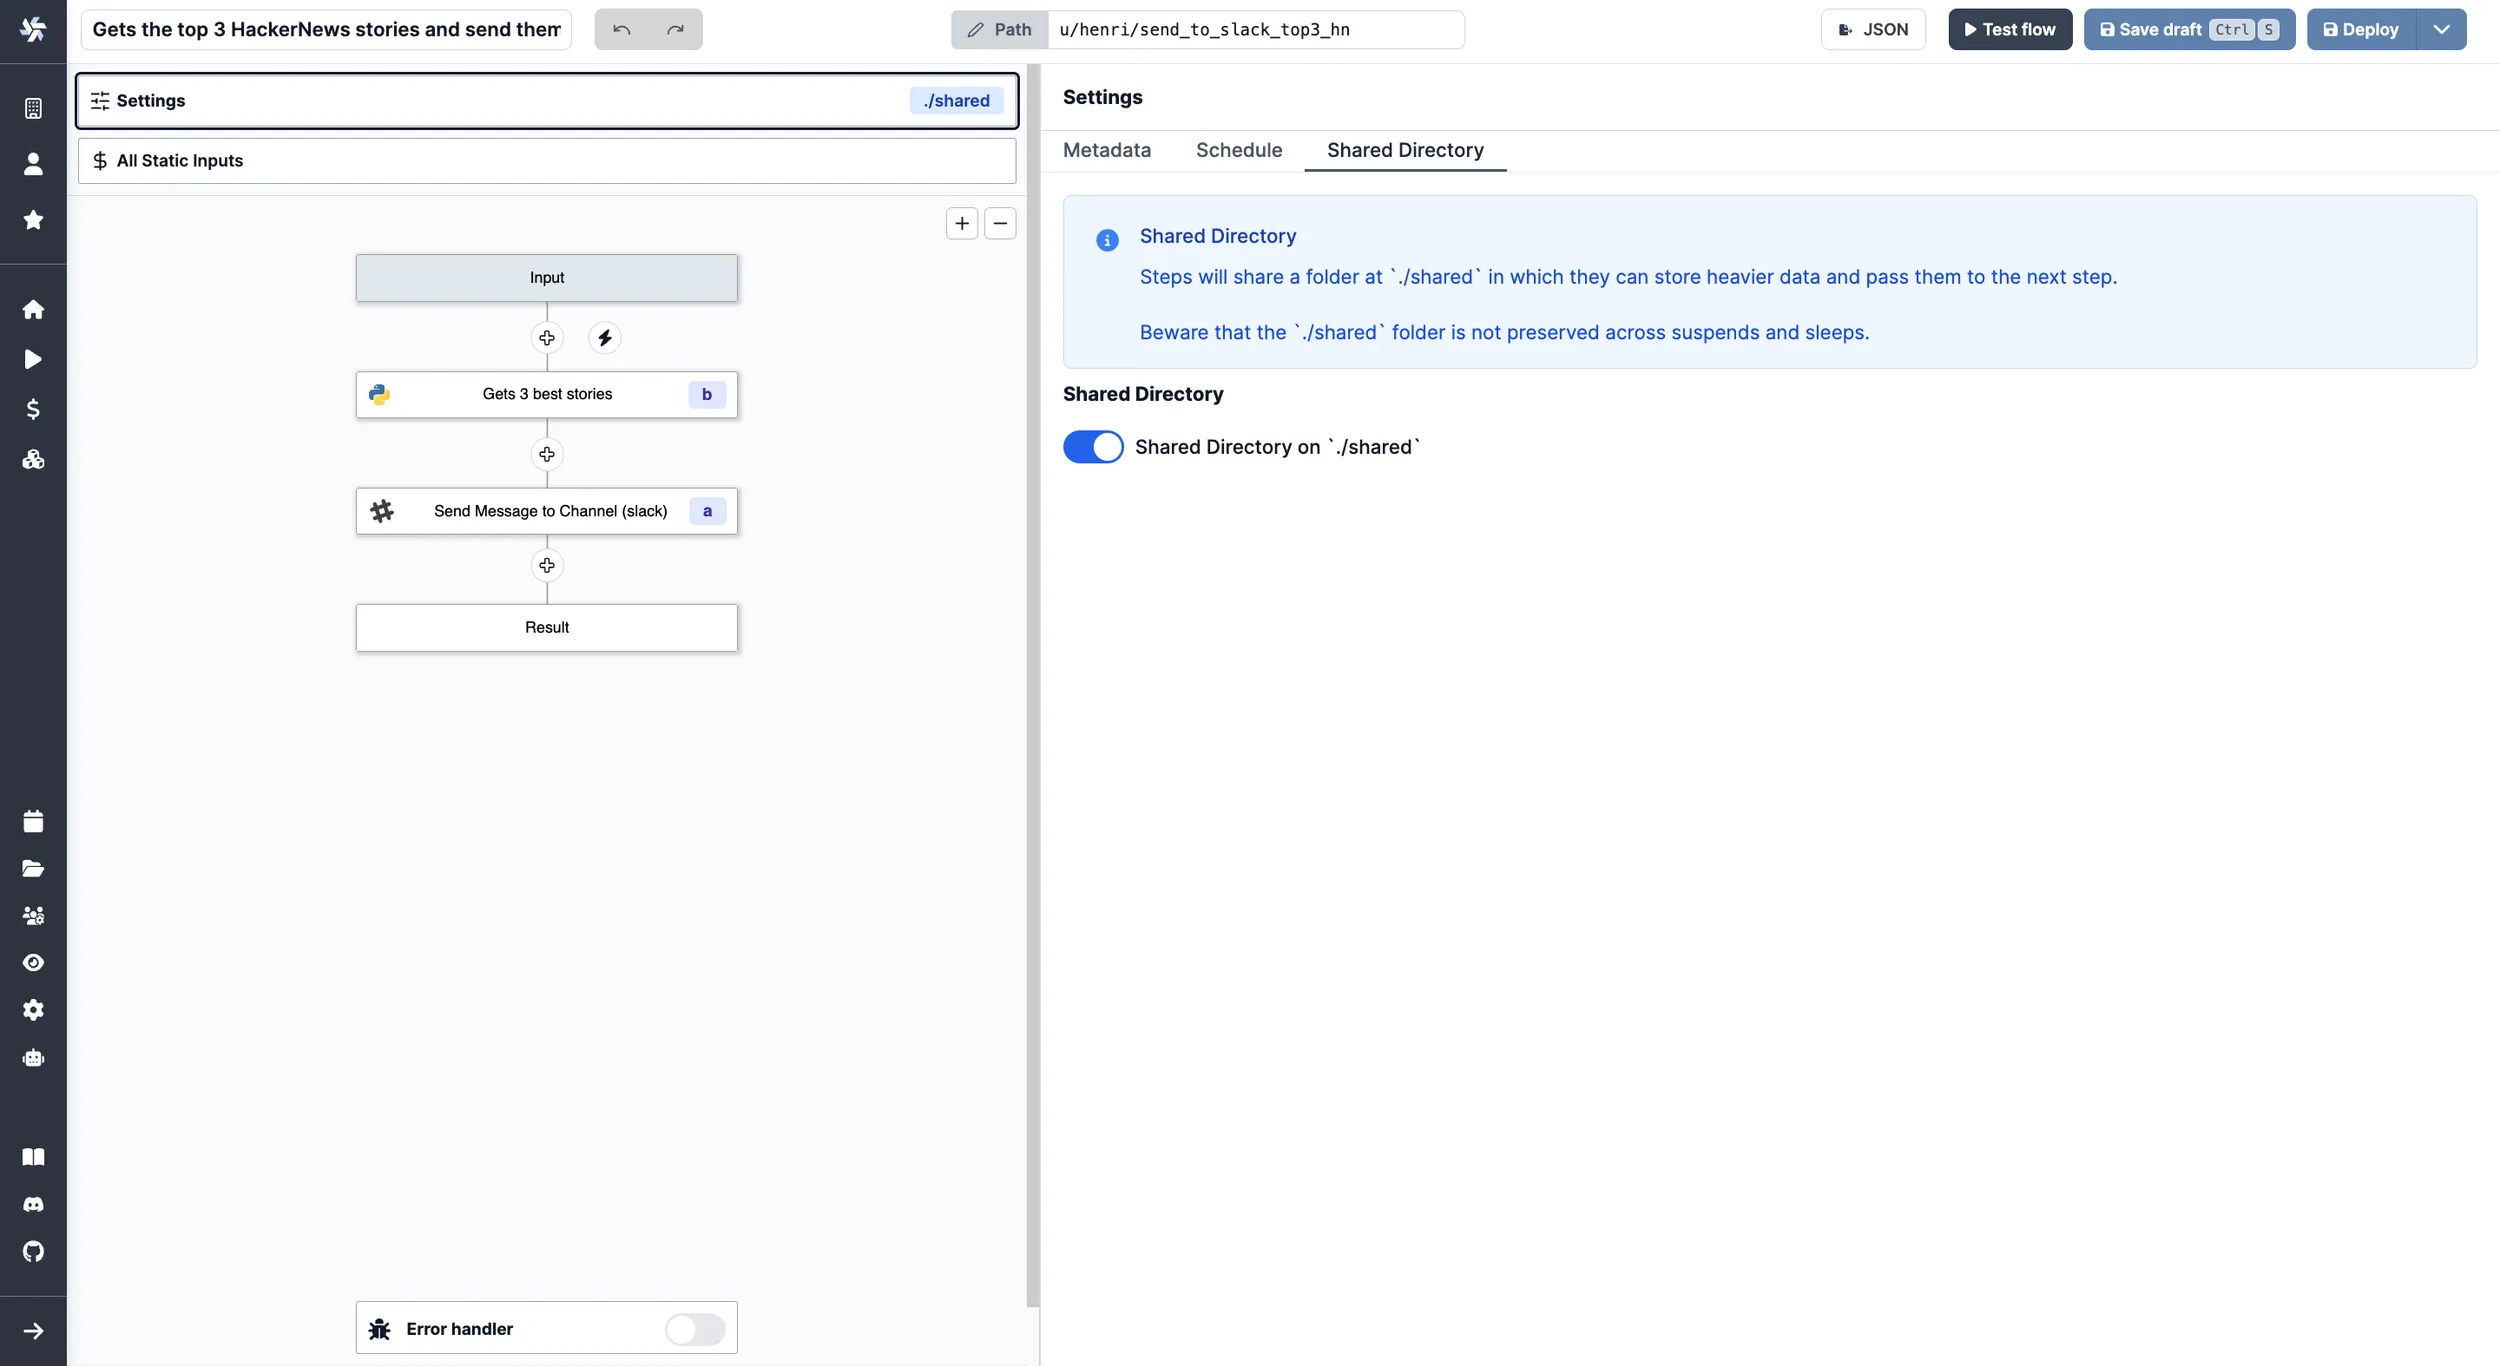
Shared Directory
Last tab of the settings menu is the Shared Directory.
By default, flows on Windmill are based on a result basis. A step will take as inputs the results of previous steps. And this works fine for lightweight automation.
For heavier ETLs and any output that is not suitable for JSON, you might want to use the Shared Directory to share data between steps. Steps share a folder at ./shared in which they can store heavier data and pass them to the next step.
Get more details on the Persistent Storage & Databases dedicated page.
Worker Group
When a worker group is defined at the flow level, any steps inside the flow will run on that worker group, regardless of the steps' worker group. If no worker group is defined, the flow controls will be executed by the default worker group 'flow' and the steps will be executed in their respective worker group.
You can always go back to this menu by clicking on Settings on the top lef, or on the name of the flow on the toolbar.
How data is exchanged between steps
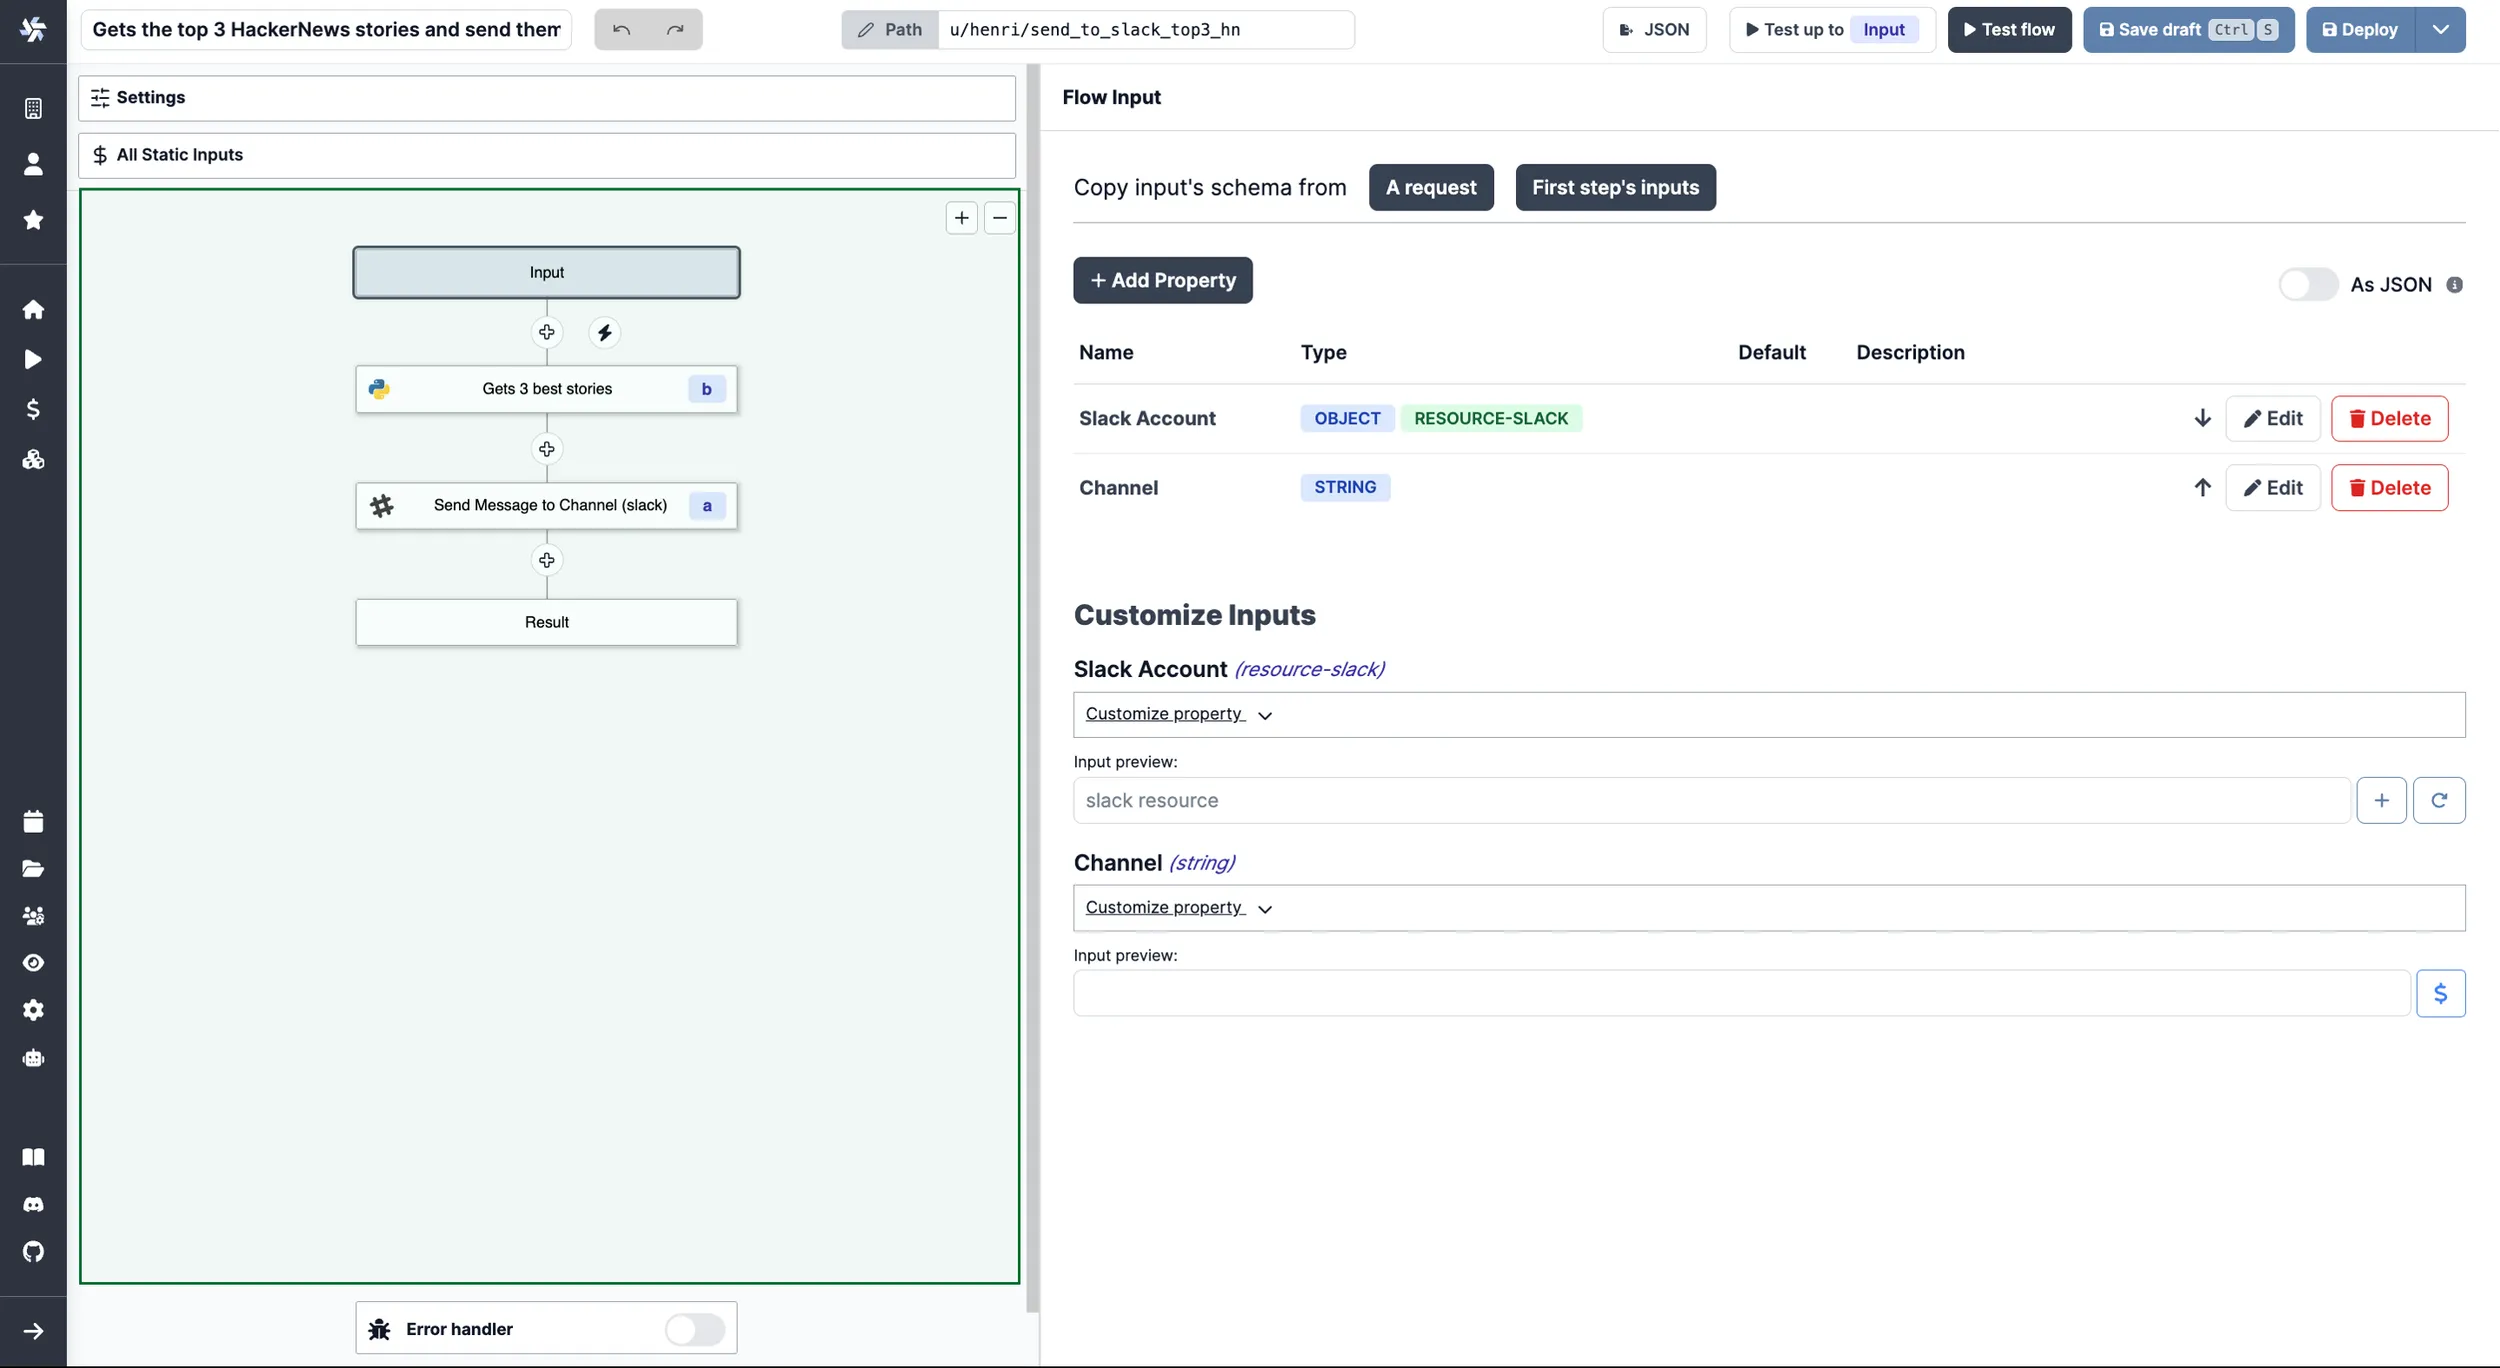
Flows on Windmill are generic and reusable, they therefore expose inputs. Input and outputs are piped together.
Inputs are either:
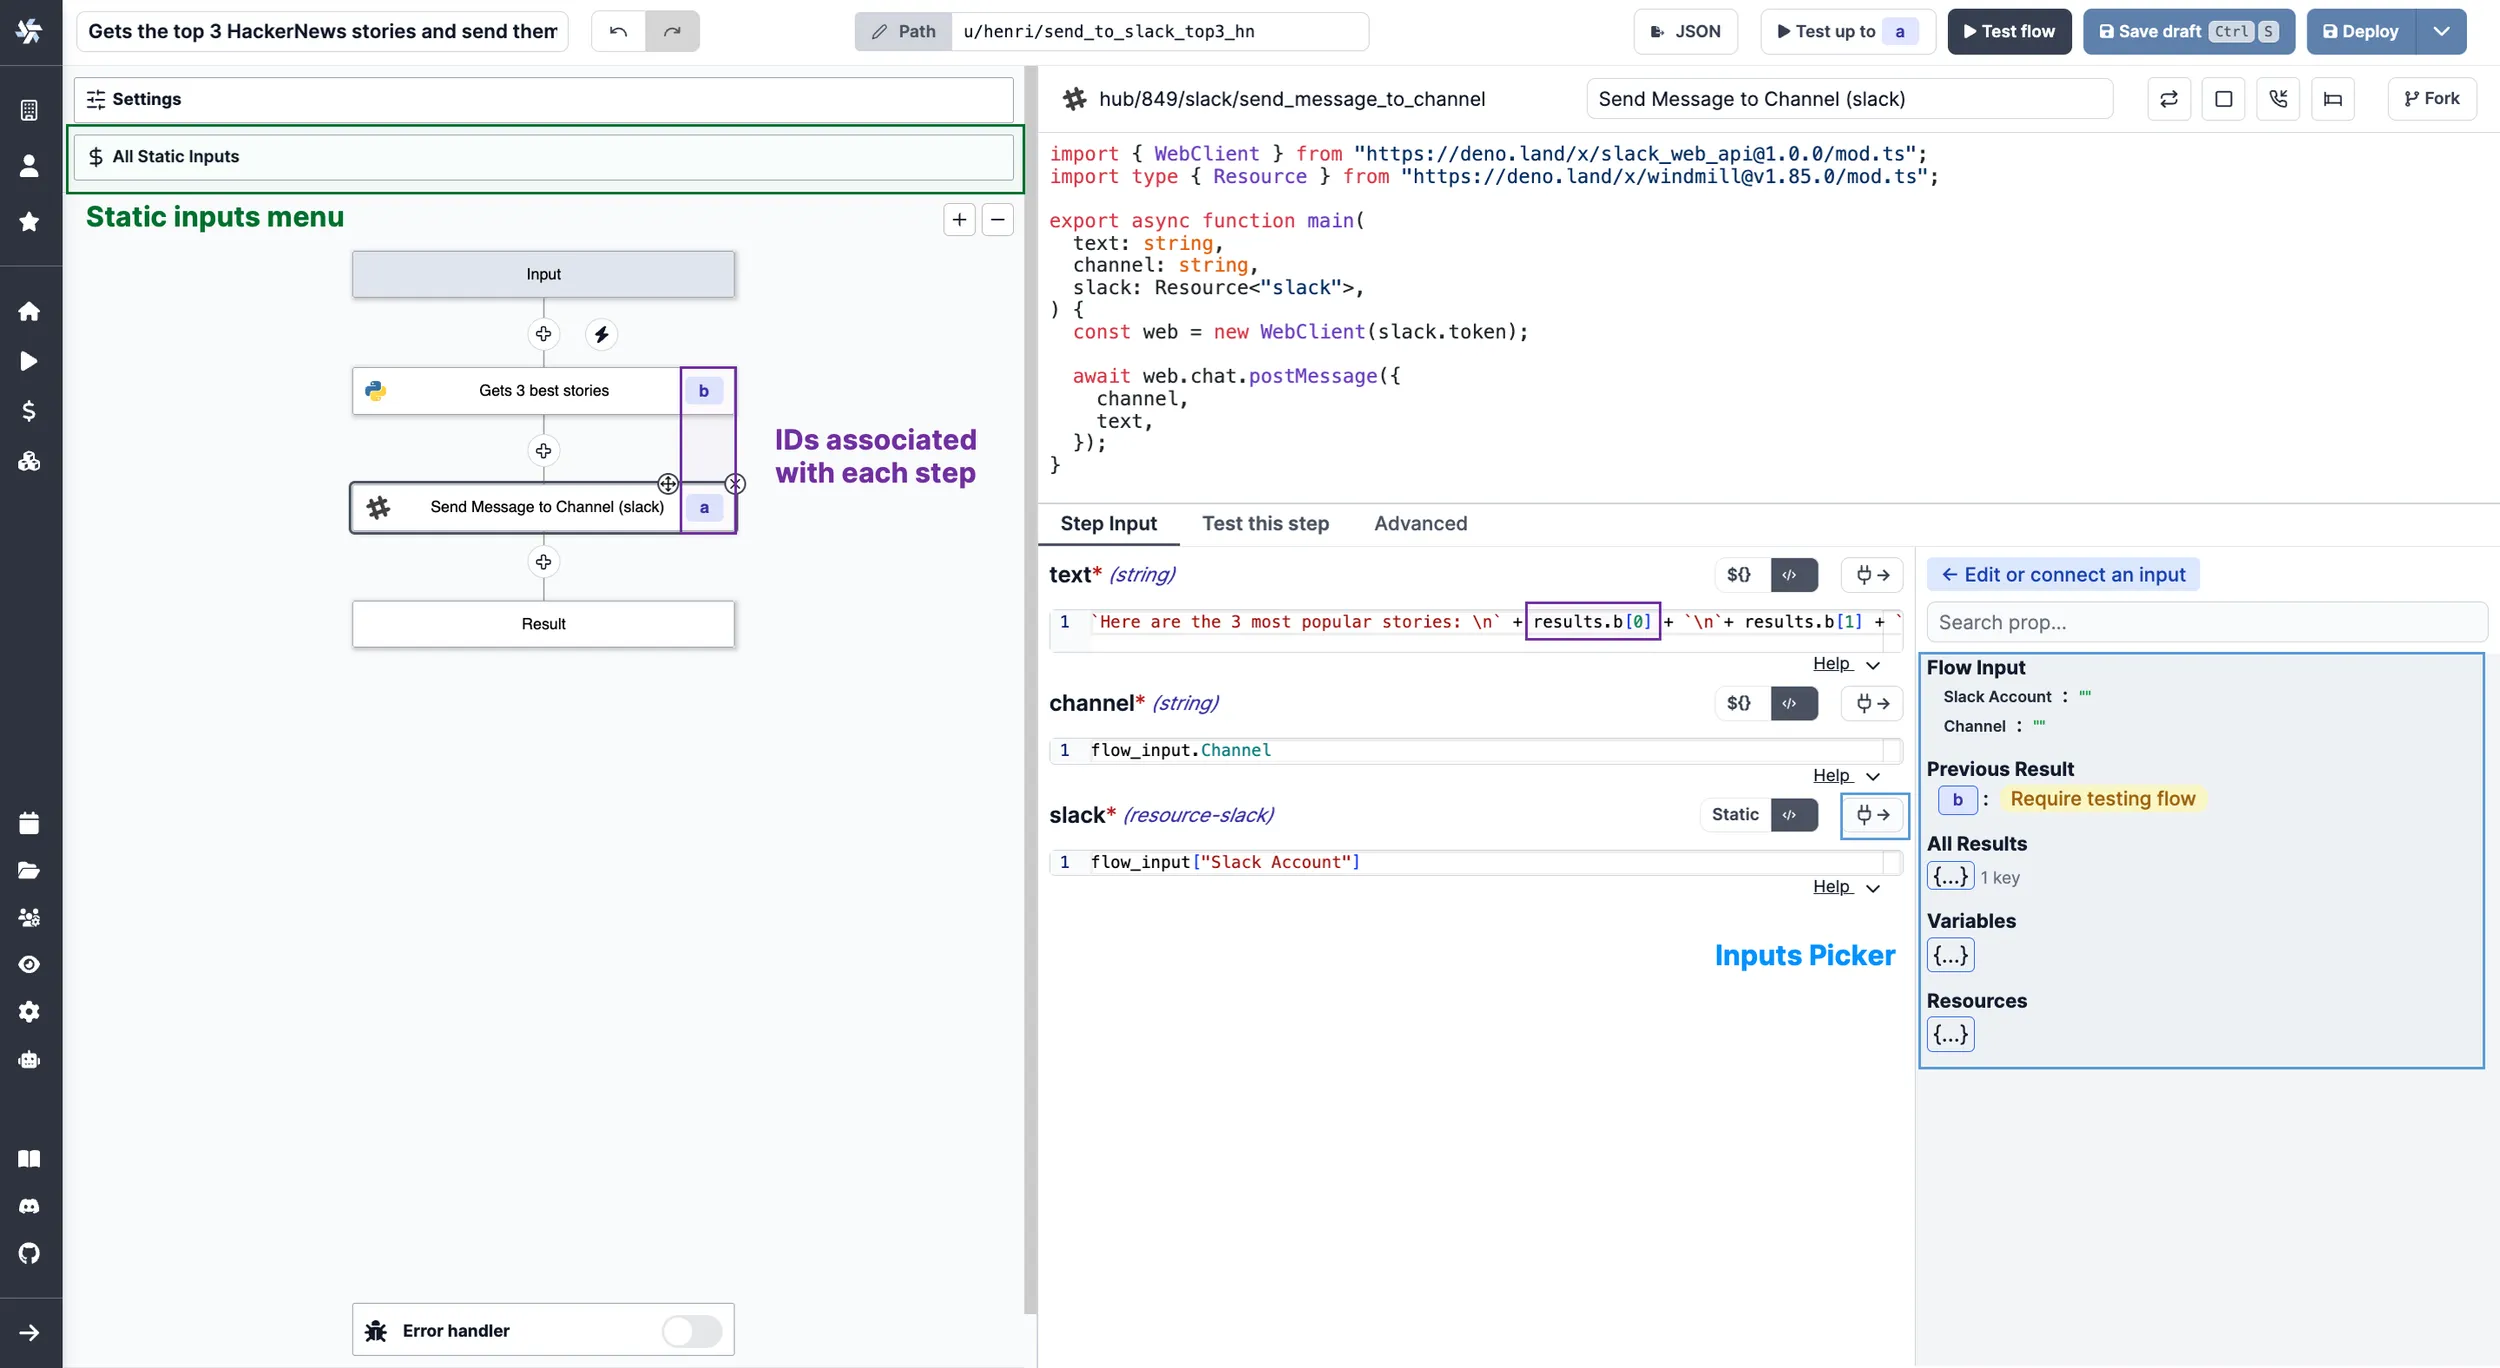
- Static: you can find them on top of the side menu. This tab centralizes the static inputs of every steps. It is akin to a file containing all constants. Modifying a value here modify it in the step input directly.
- Dynamically linked to others: with JSON objects as result that allow to refer to the output of any step.
You can refer to the result of any step:
- using the id associated with the step
- clicking on the plug logo that will let you pick flow inputs or previous steps' results (after testing flow or step).
Flow editor
On the left of the editor, you'll find a graphical view of the flow. From there you can architecture your flow and take action at each step.
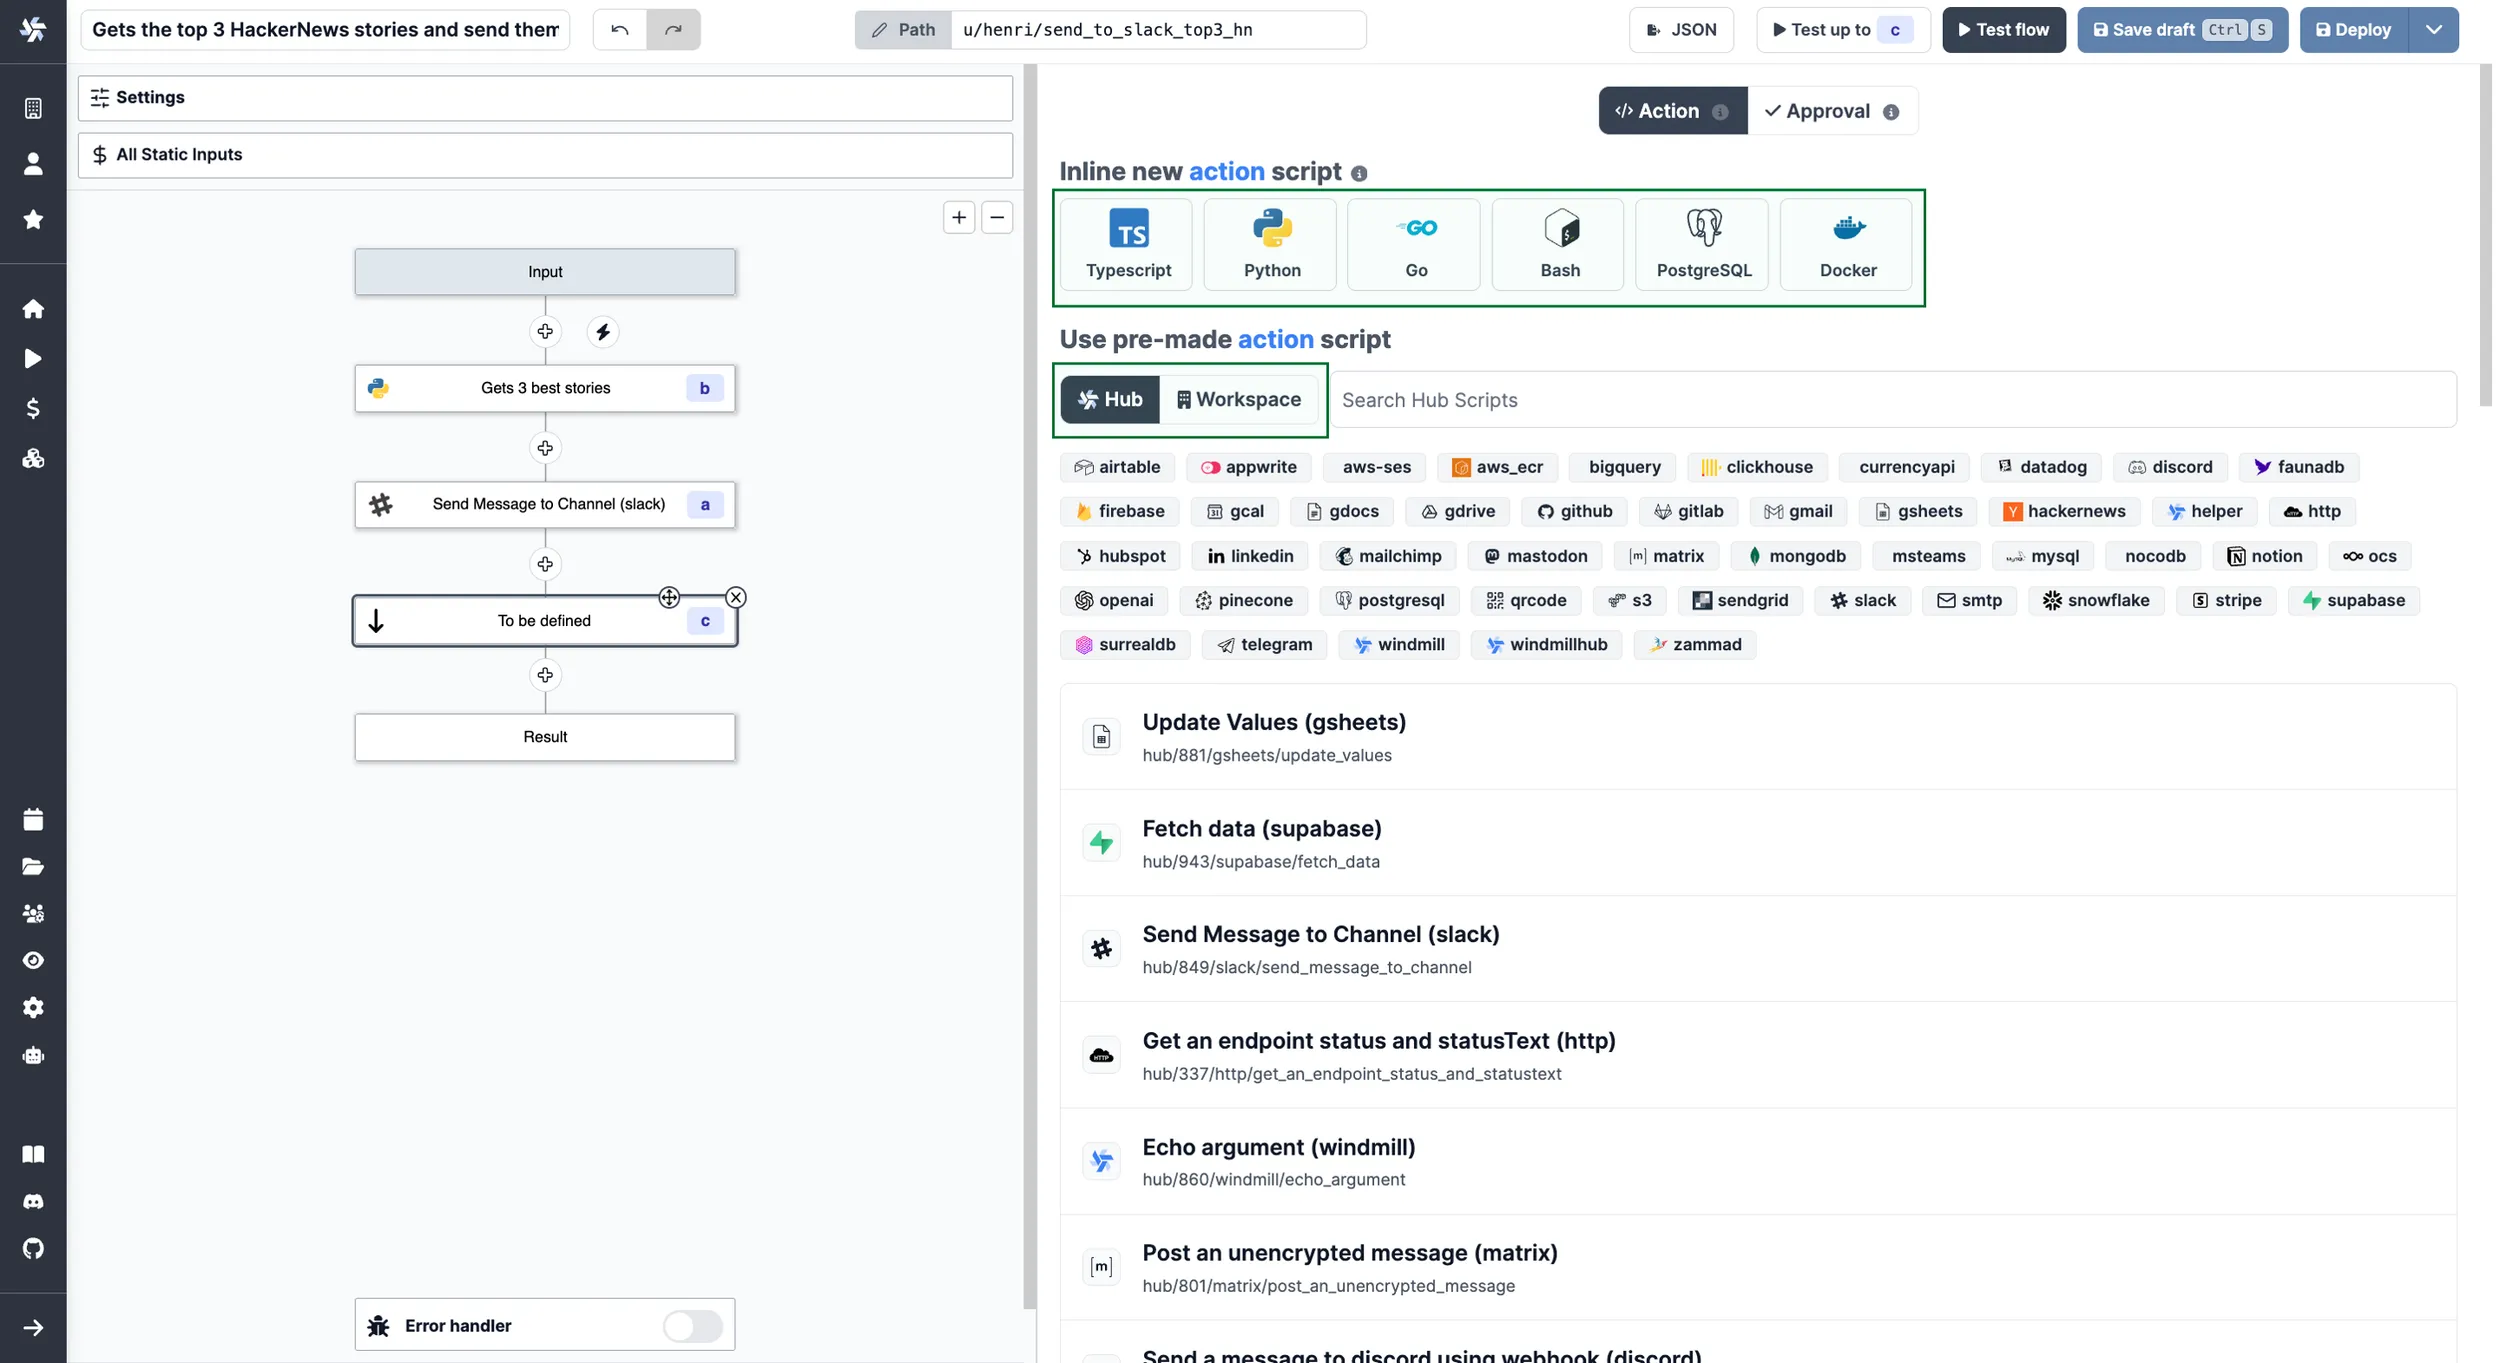
There are four kinds of scripts: Action, Trigger, Approval and Error handler. You can sequence them how you want. Action is the default script type.
Each script can be called from Workspace or Hub, you can also decide to write them inline.
Your flow can be deepened with additional features, below are some major ones.
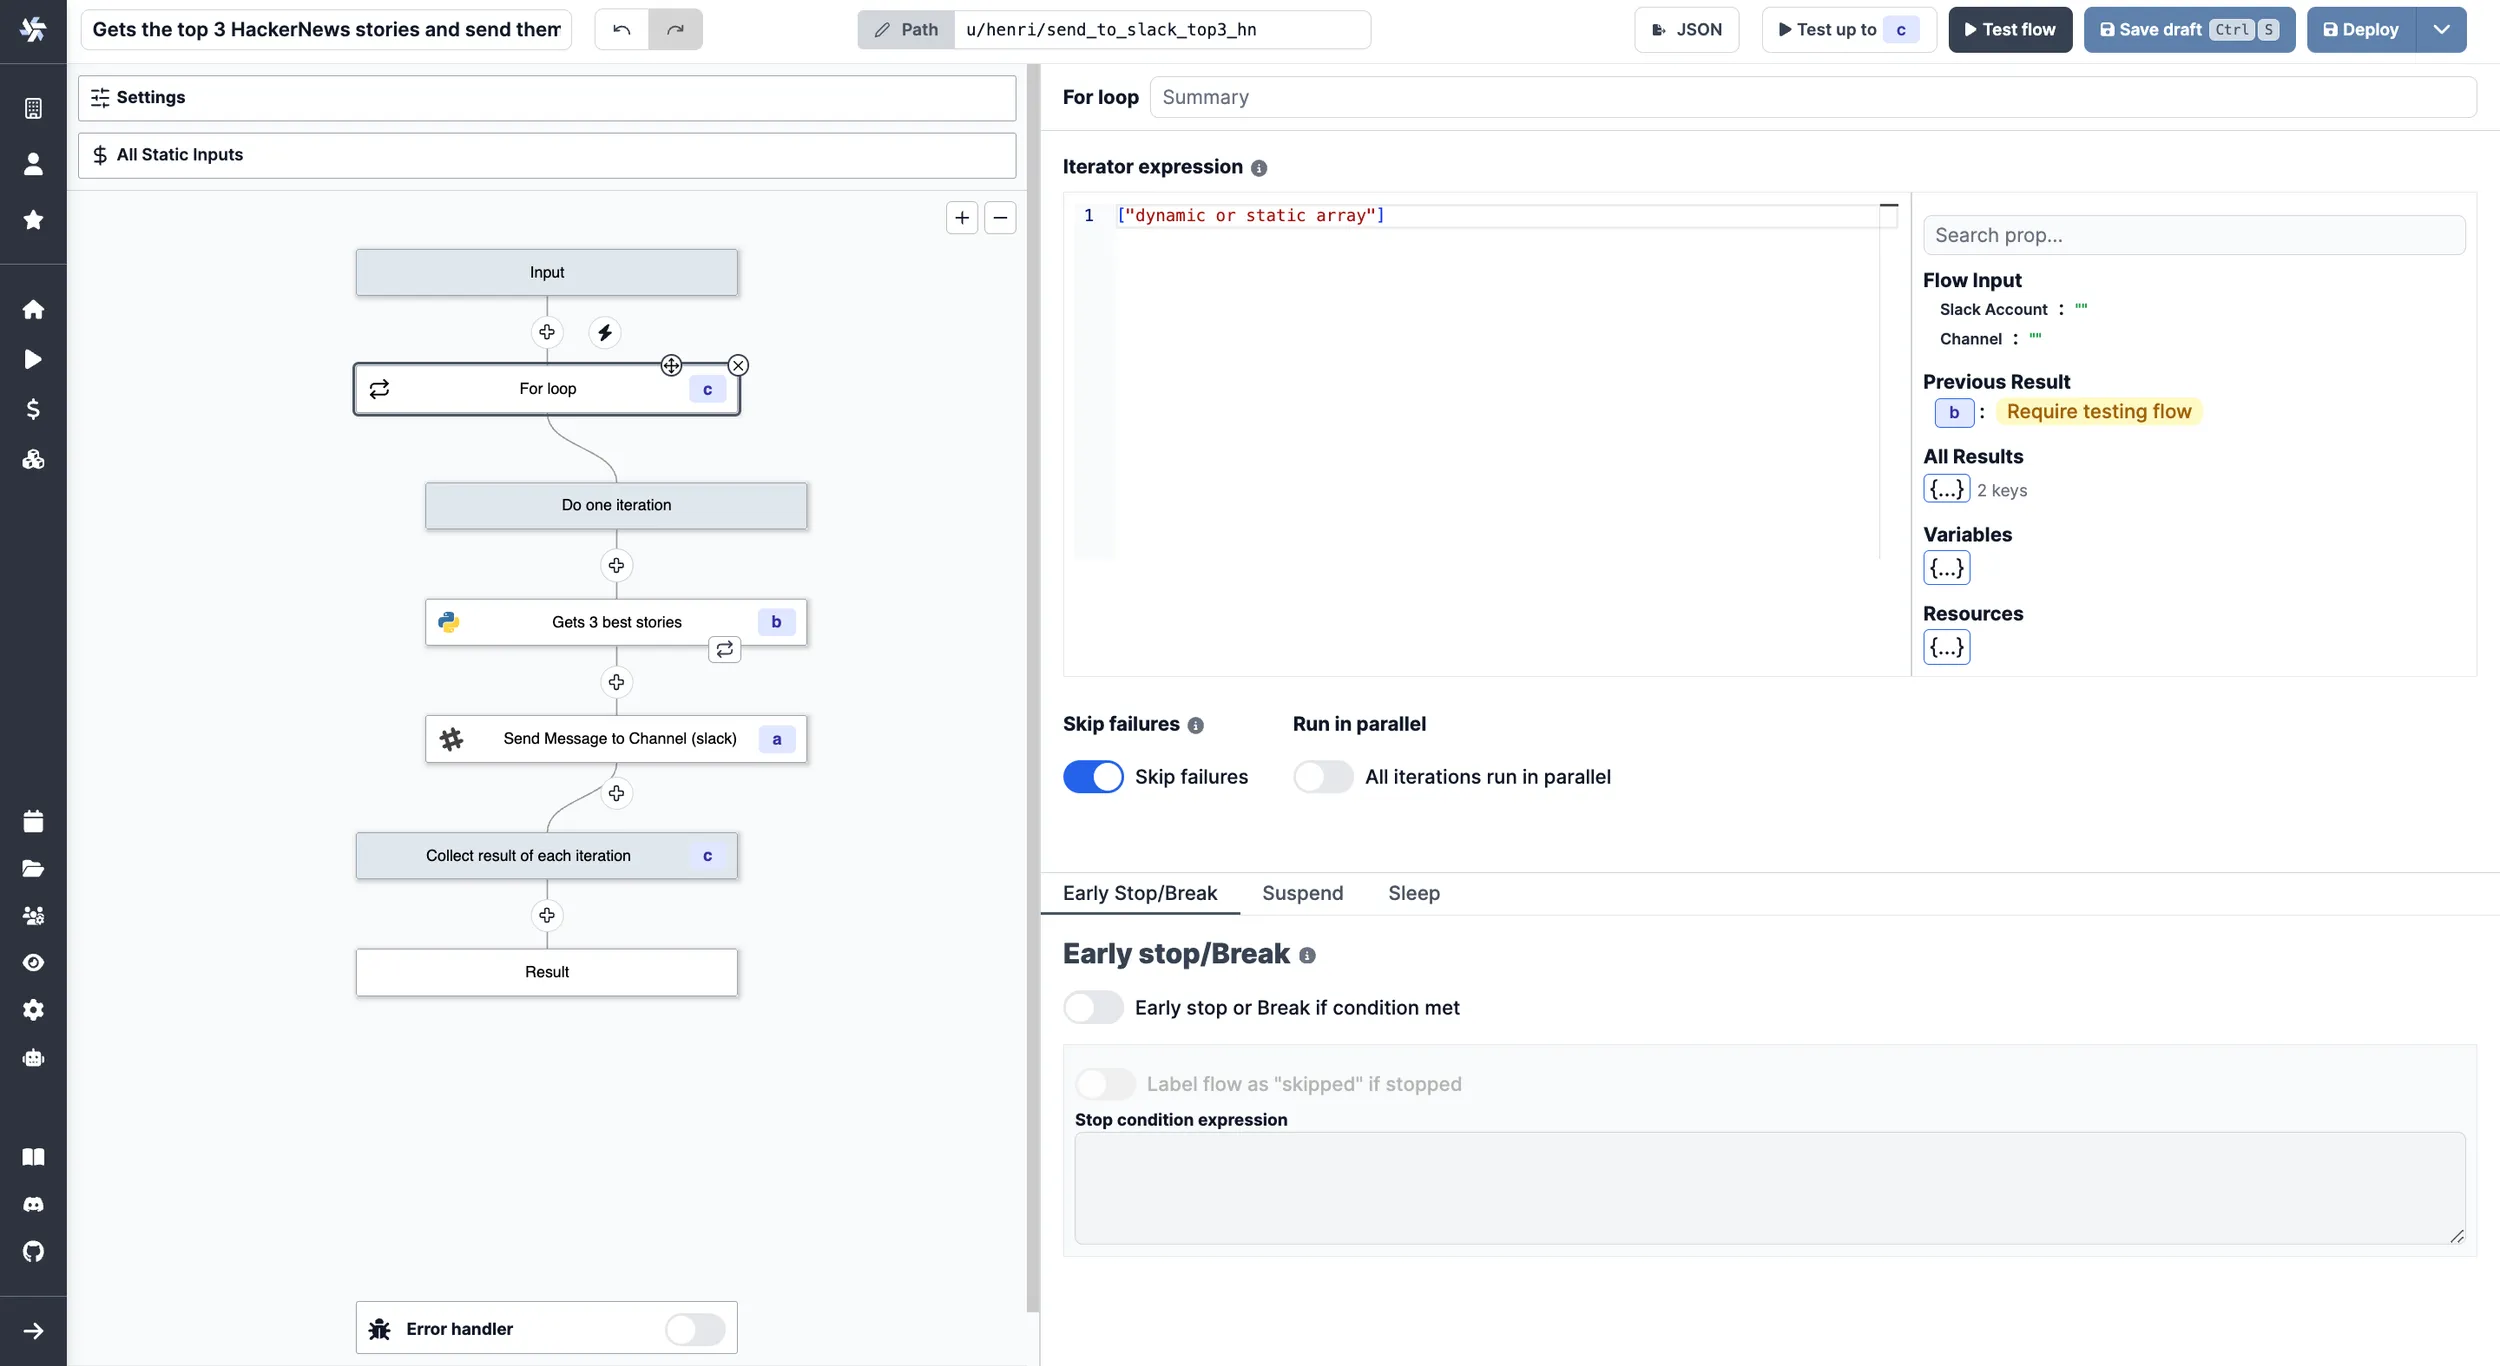
For Loops
For Loops are a special type of steps that allows you to iterate over a list of items, given by an iterator expression.
While Loops
While loops execute a sequence of code indefinitely until the user cancels or a step set to Early Stop stops.
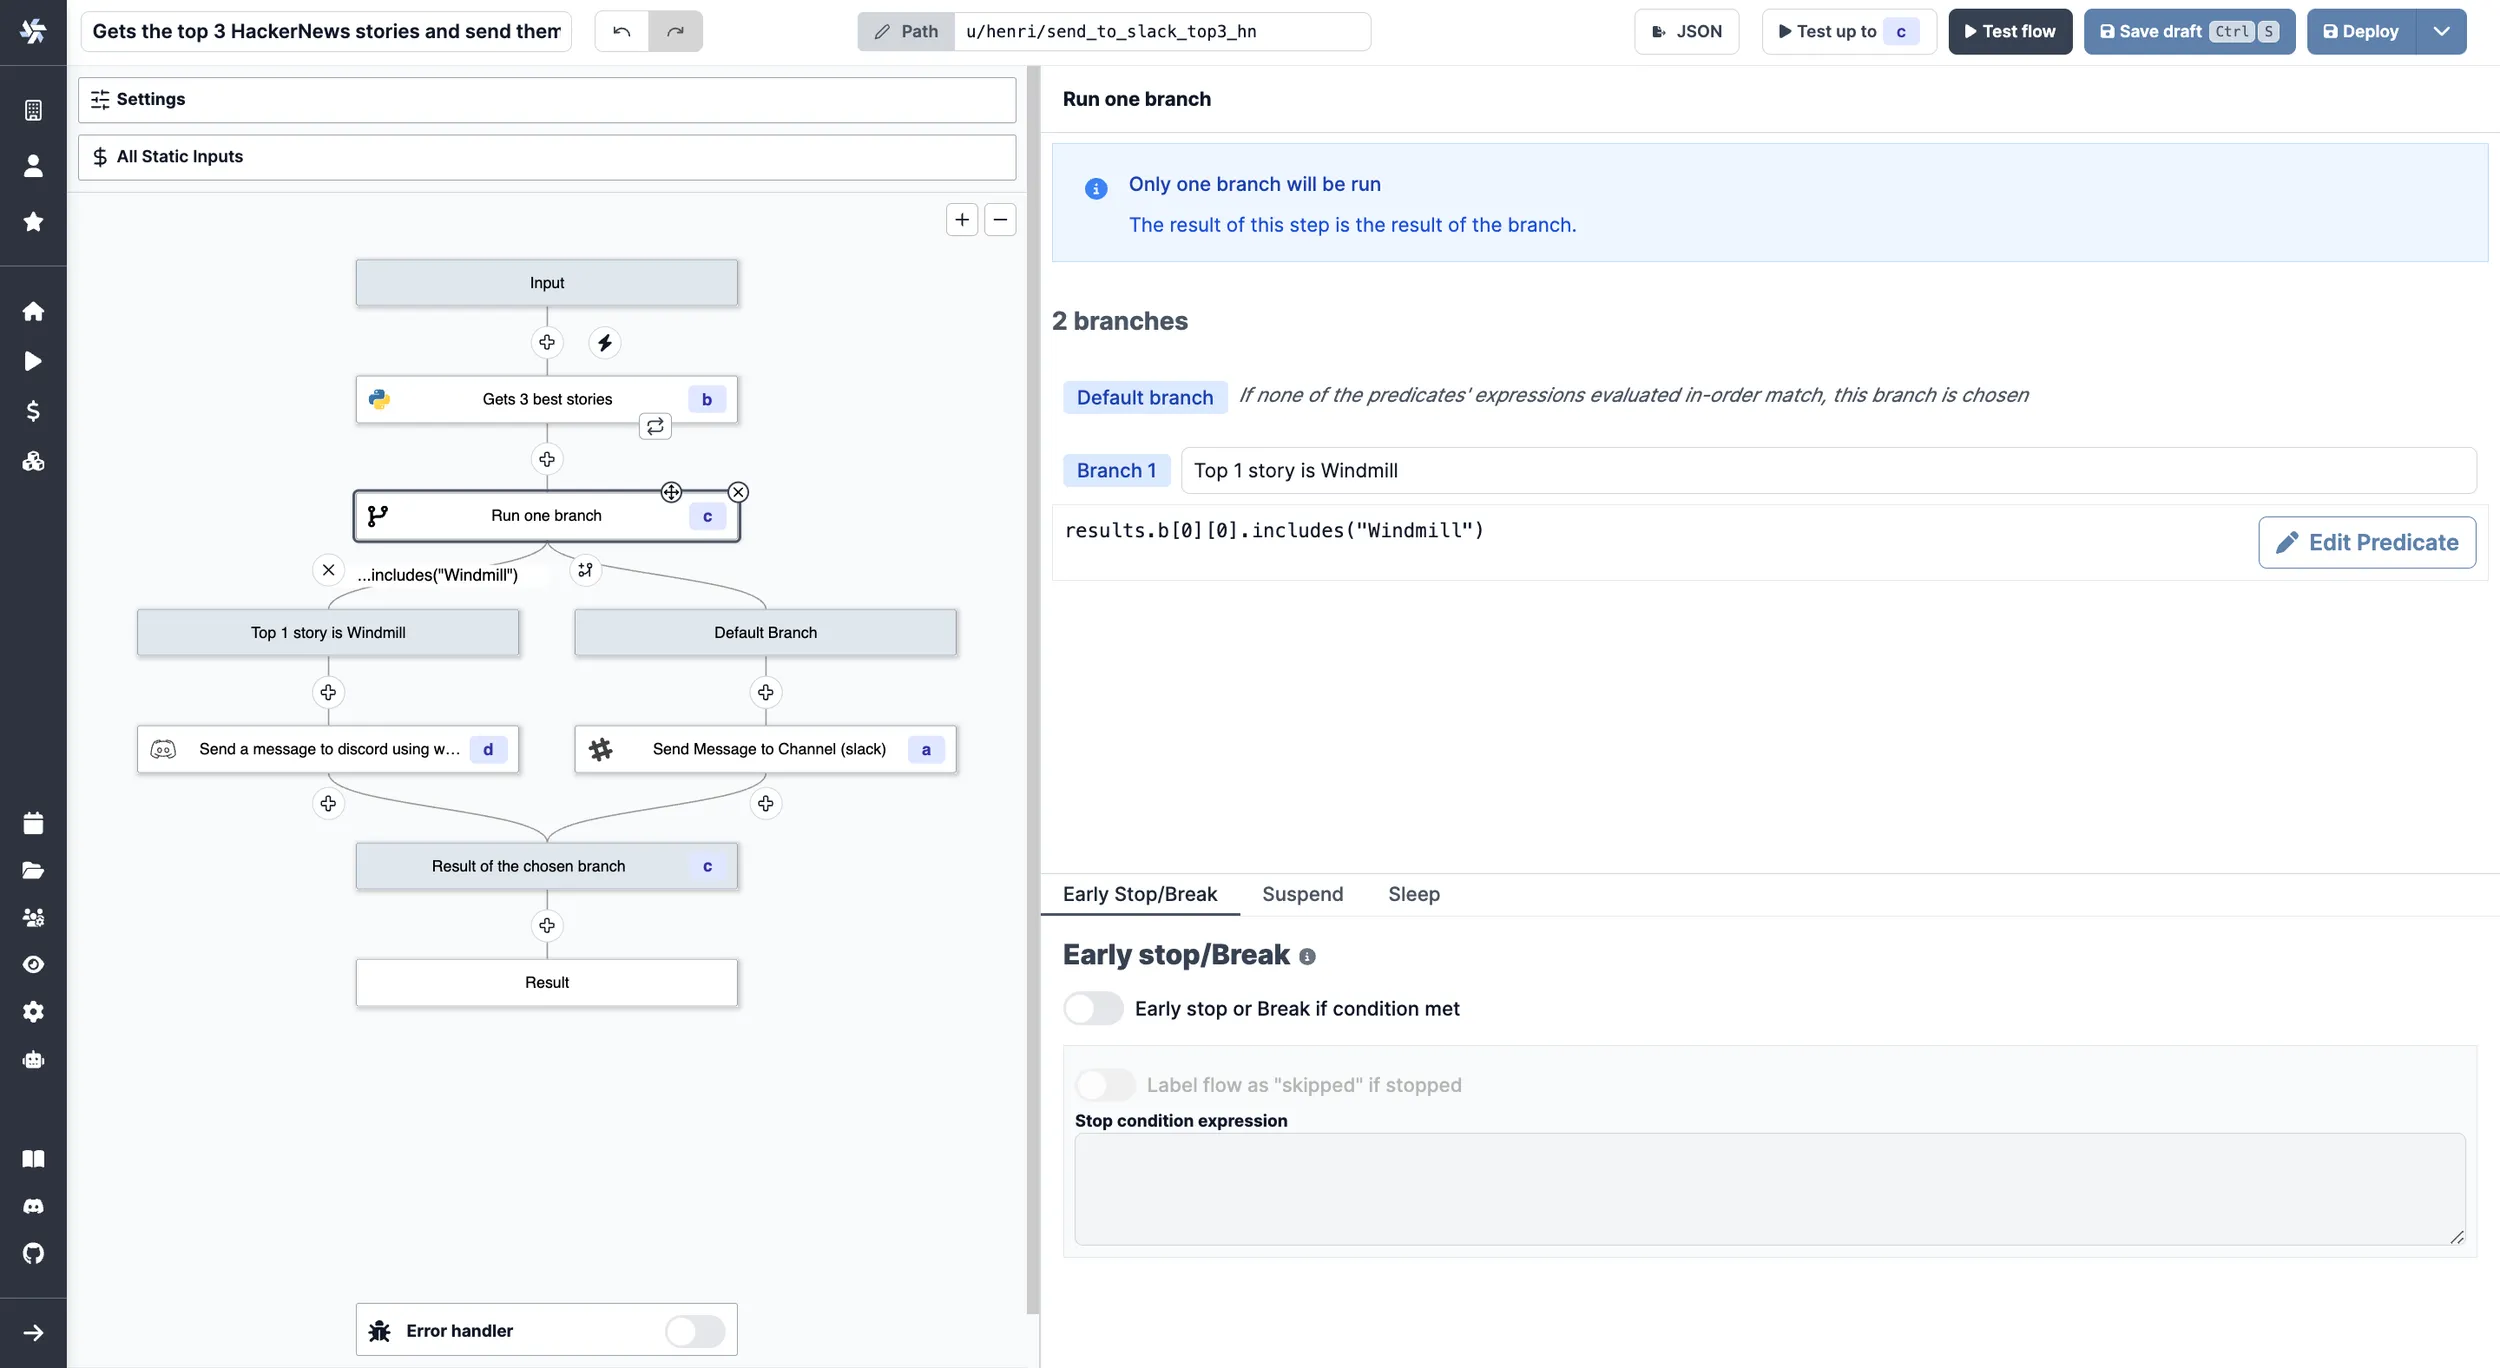
Branching
Branches build branching logic to create and manage complex workflows based on conditions. There are two of them:
- Branch one: allows you to execute a branch if a condition is true.
- Branch all: allows you to execute all the branches in parallel, as if each branch is a flow.
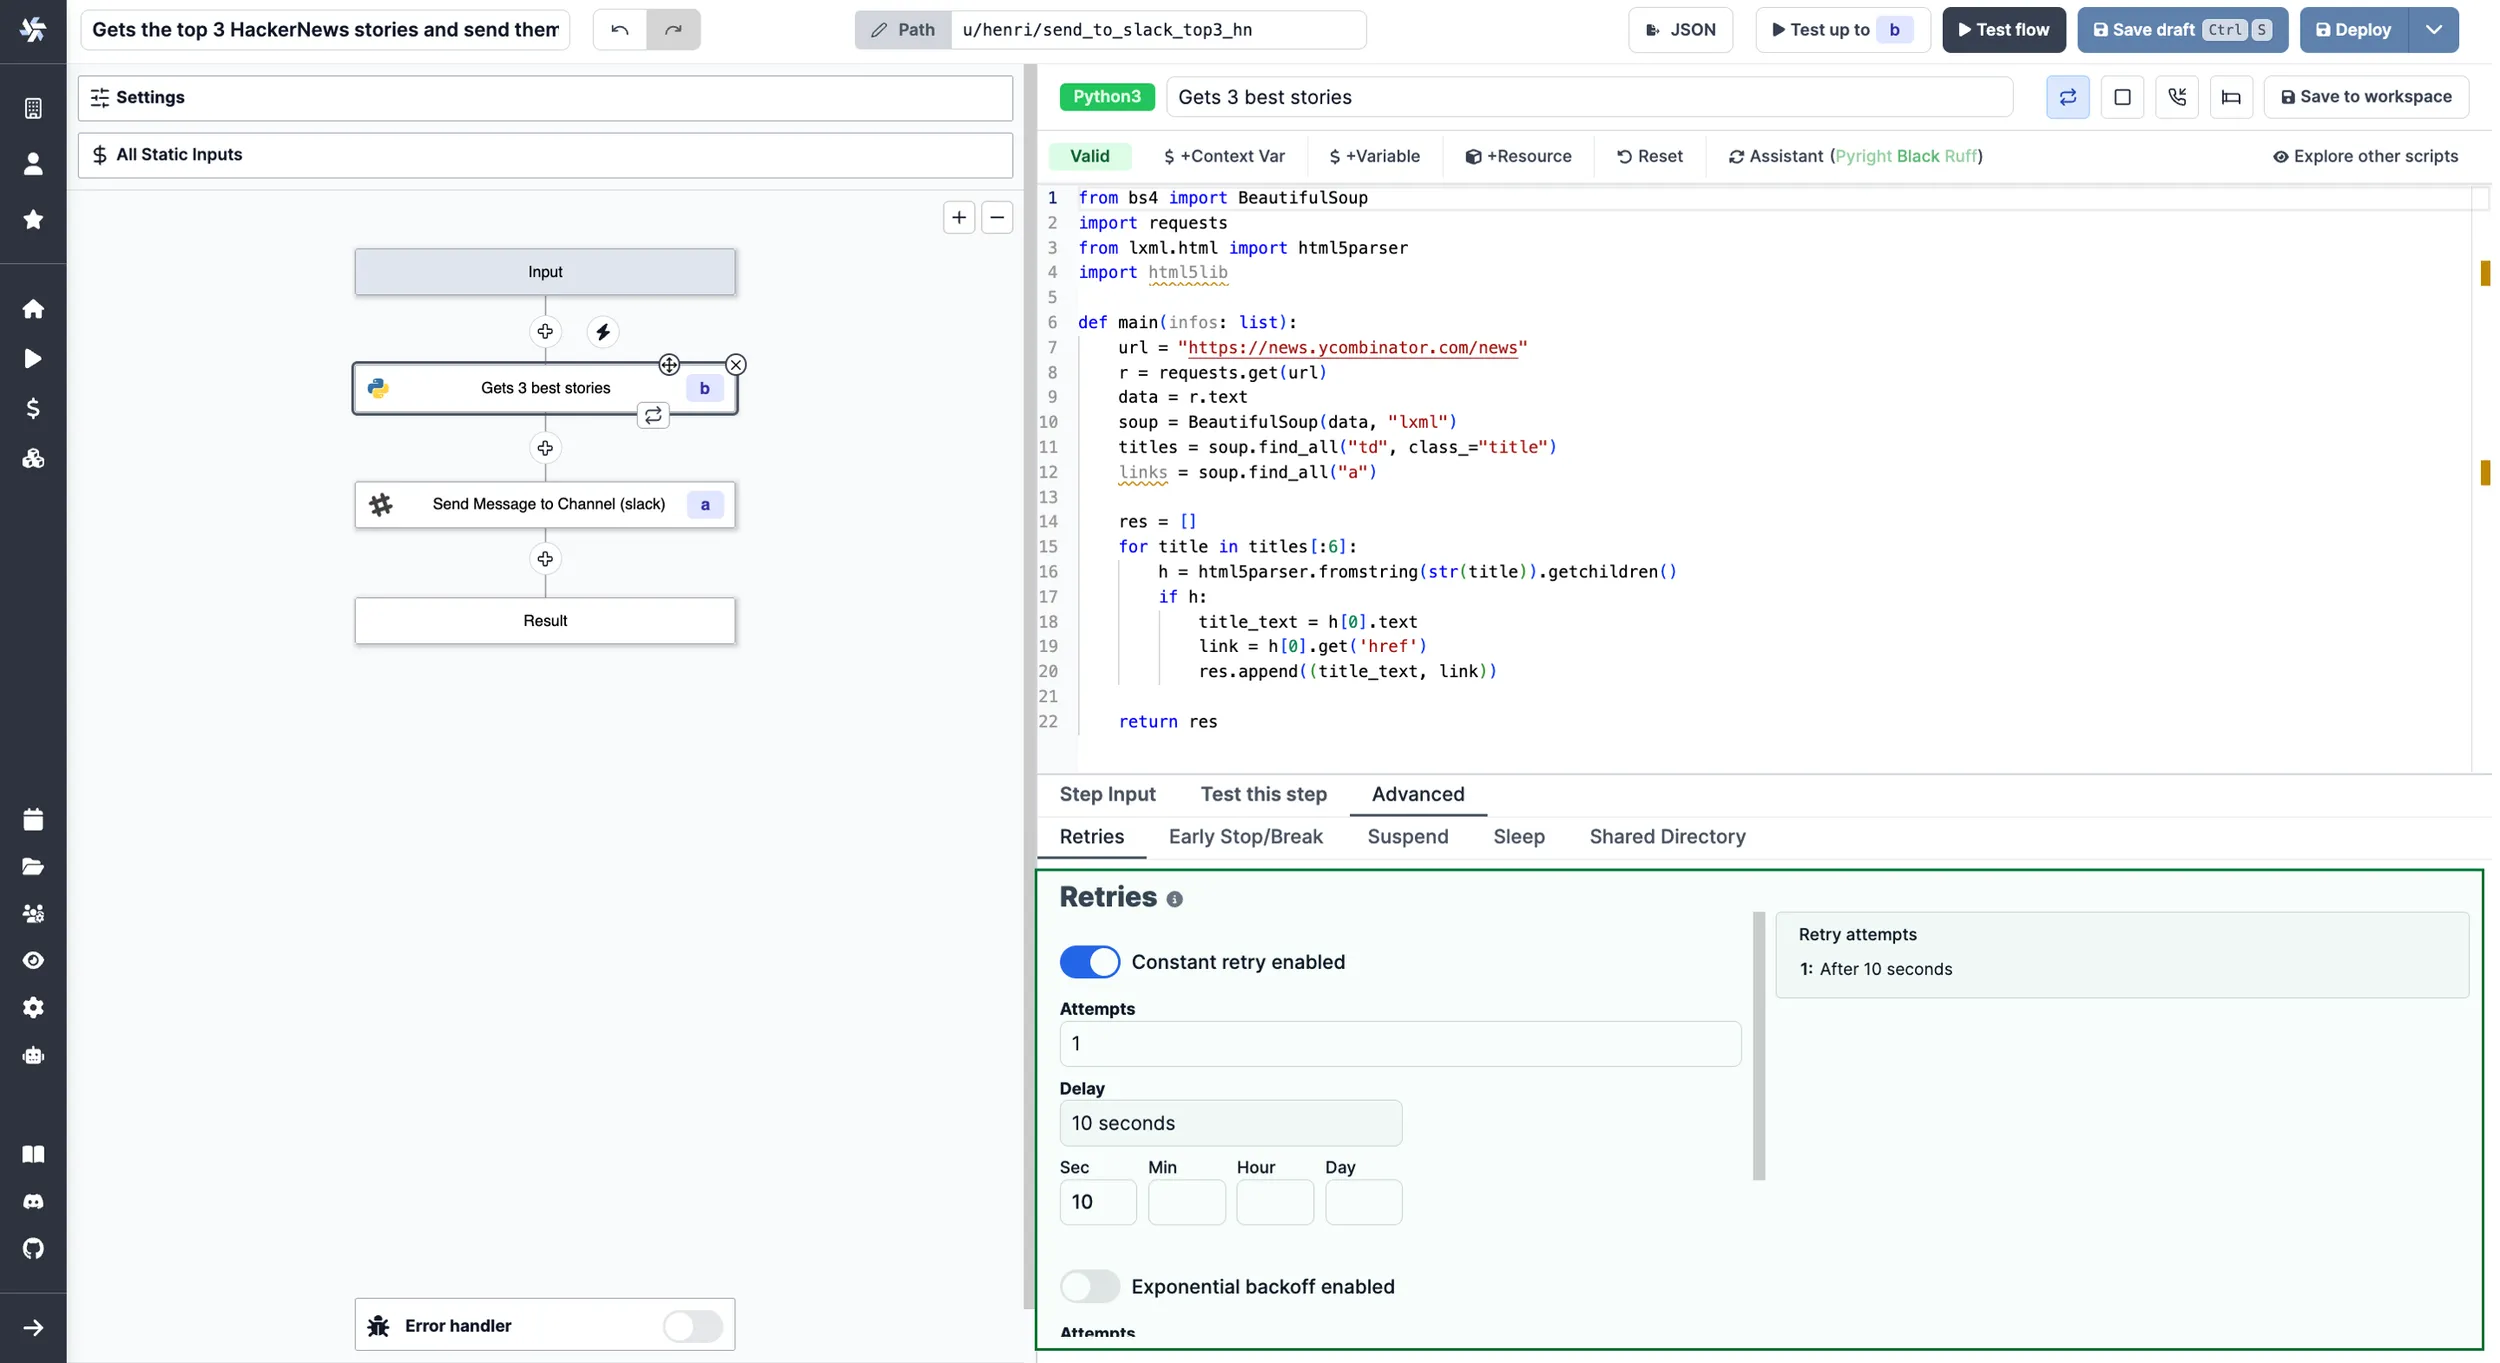
Retries
At each step, Windmill allows you to customize the number of retries by going on the Advanced tabs of the individual script. If defined, upon error this step will be retried with a delay and a maximum number of attempts.
Suspend/Approval Step
At each step you can add Approval Scripts to manage security and control over your flows.
Request approvals can be sent by email, Slack, anything. Then you can automatically resume workflows with secret webhooks after the approval steps.
You can find all the flows' features in their dedicated section.
Triggers
There are several ways to trigger a flow with Windmill.
- The most direct one is from the autogenerated UI provided by Windmill. It is the one you will see from the flow editor.
- A similar but more customized way is to use Windmill Apps using the App editor.
- We saw above that you can trigger flows using schedules that you can check from the Runs page. One special way to use scheduling is to combine it with trigger scripts.
- Execute flows from the CLI to trigger your flows from your terminal.
- Trigger the flow from another flow.
- Using trigger scripts to trigger only if a condition has been met.
- Webhooks. Each Flow created in the app gets autogenerated webhooks. You can see them once you flow is saved. You can even trigger flows without leaving Slack!
Test your flow
You don't have to explore all Flow editor possibilities at once. At each step, test what you're building to keep control on your wonder. You can also test up to a certain step by clicking on an action (x) and then on Test up to x.
When you're done, deploy your flow, schedule it, create and app from it, or even publish it to Hub.
Follow our detailed section on the Flow Editor for more information.
Flow as Code
Flows are not the only way to write distributed programs that execute distinct jobs. Another approach is to write a program that defines the jobs and their dependencies, and then execute that program within a Python or TypeScript script. This is known as workflows as code.