Go Quickstart
In this quick start guide, we will write our first script in Go.
Scripts are the basic building blocks in Windmill. They can be run and scheduled as standalone, chained together to create Flows or displayed with a personalized User Interface as Apps.
Scripts consist of 2 parts:
- Code: for Go scripts, it must have at least a main function.
- Settings: settings & metadata about the Script such as its path, summary, description, jsonschema of its inputs (inferred from its signature).
When stored in a code repository, those 2 parts are stored separately at <path>.ts and <path>.script.yaml.
Below is a simple example of a script built in Go with Windmill:
package inner

import (
	"net/http"
)

func main(url string) (bool, error) {
	resp, err := http.Get(url) // send a GET request to the provided URL
	if err != nil {
		return false, err // if there is an error, return false and the error
	}
	defer resp.Body.Close() // make sure to close the response body when the function returns

	// if the status code is between 200 and 299, the page exists
	if resp.StatusCode >= 200 && resp.StatusCode <= 299 {
		return true, nil
	}

	// if the status code is not between 200 and 299, the page does not exist
	return false, nil
}
In this quick start guide, we'll create a script that greets the operator running it.
From the Home page, click +Script. This will take you to the
first step of script creation: Metadata.
Settings
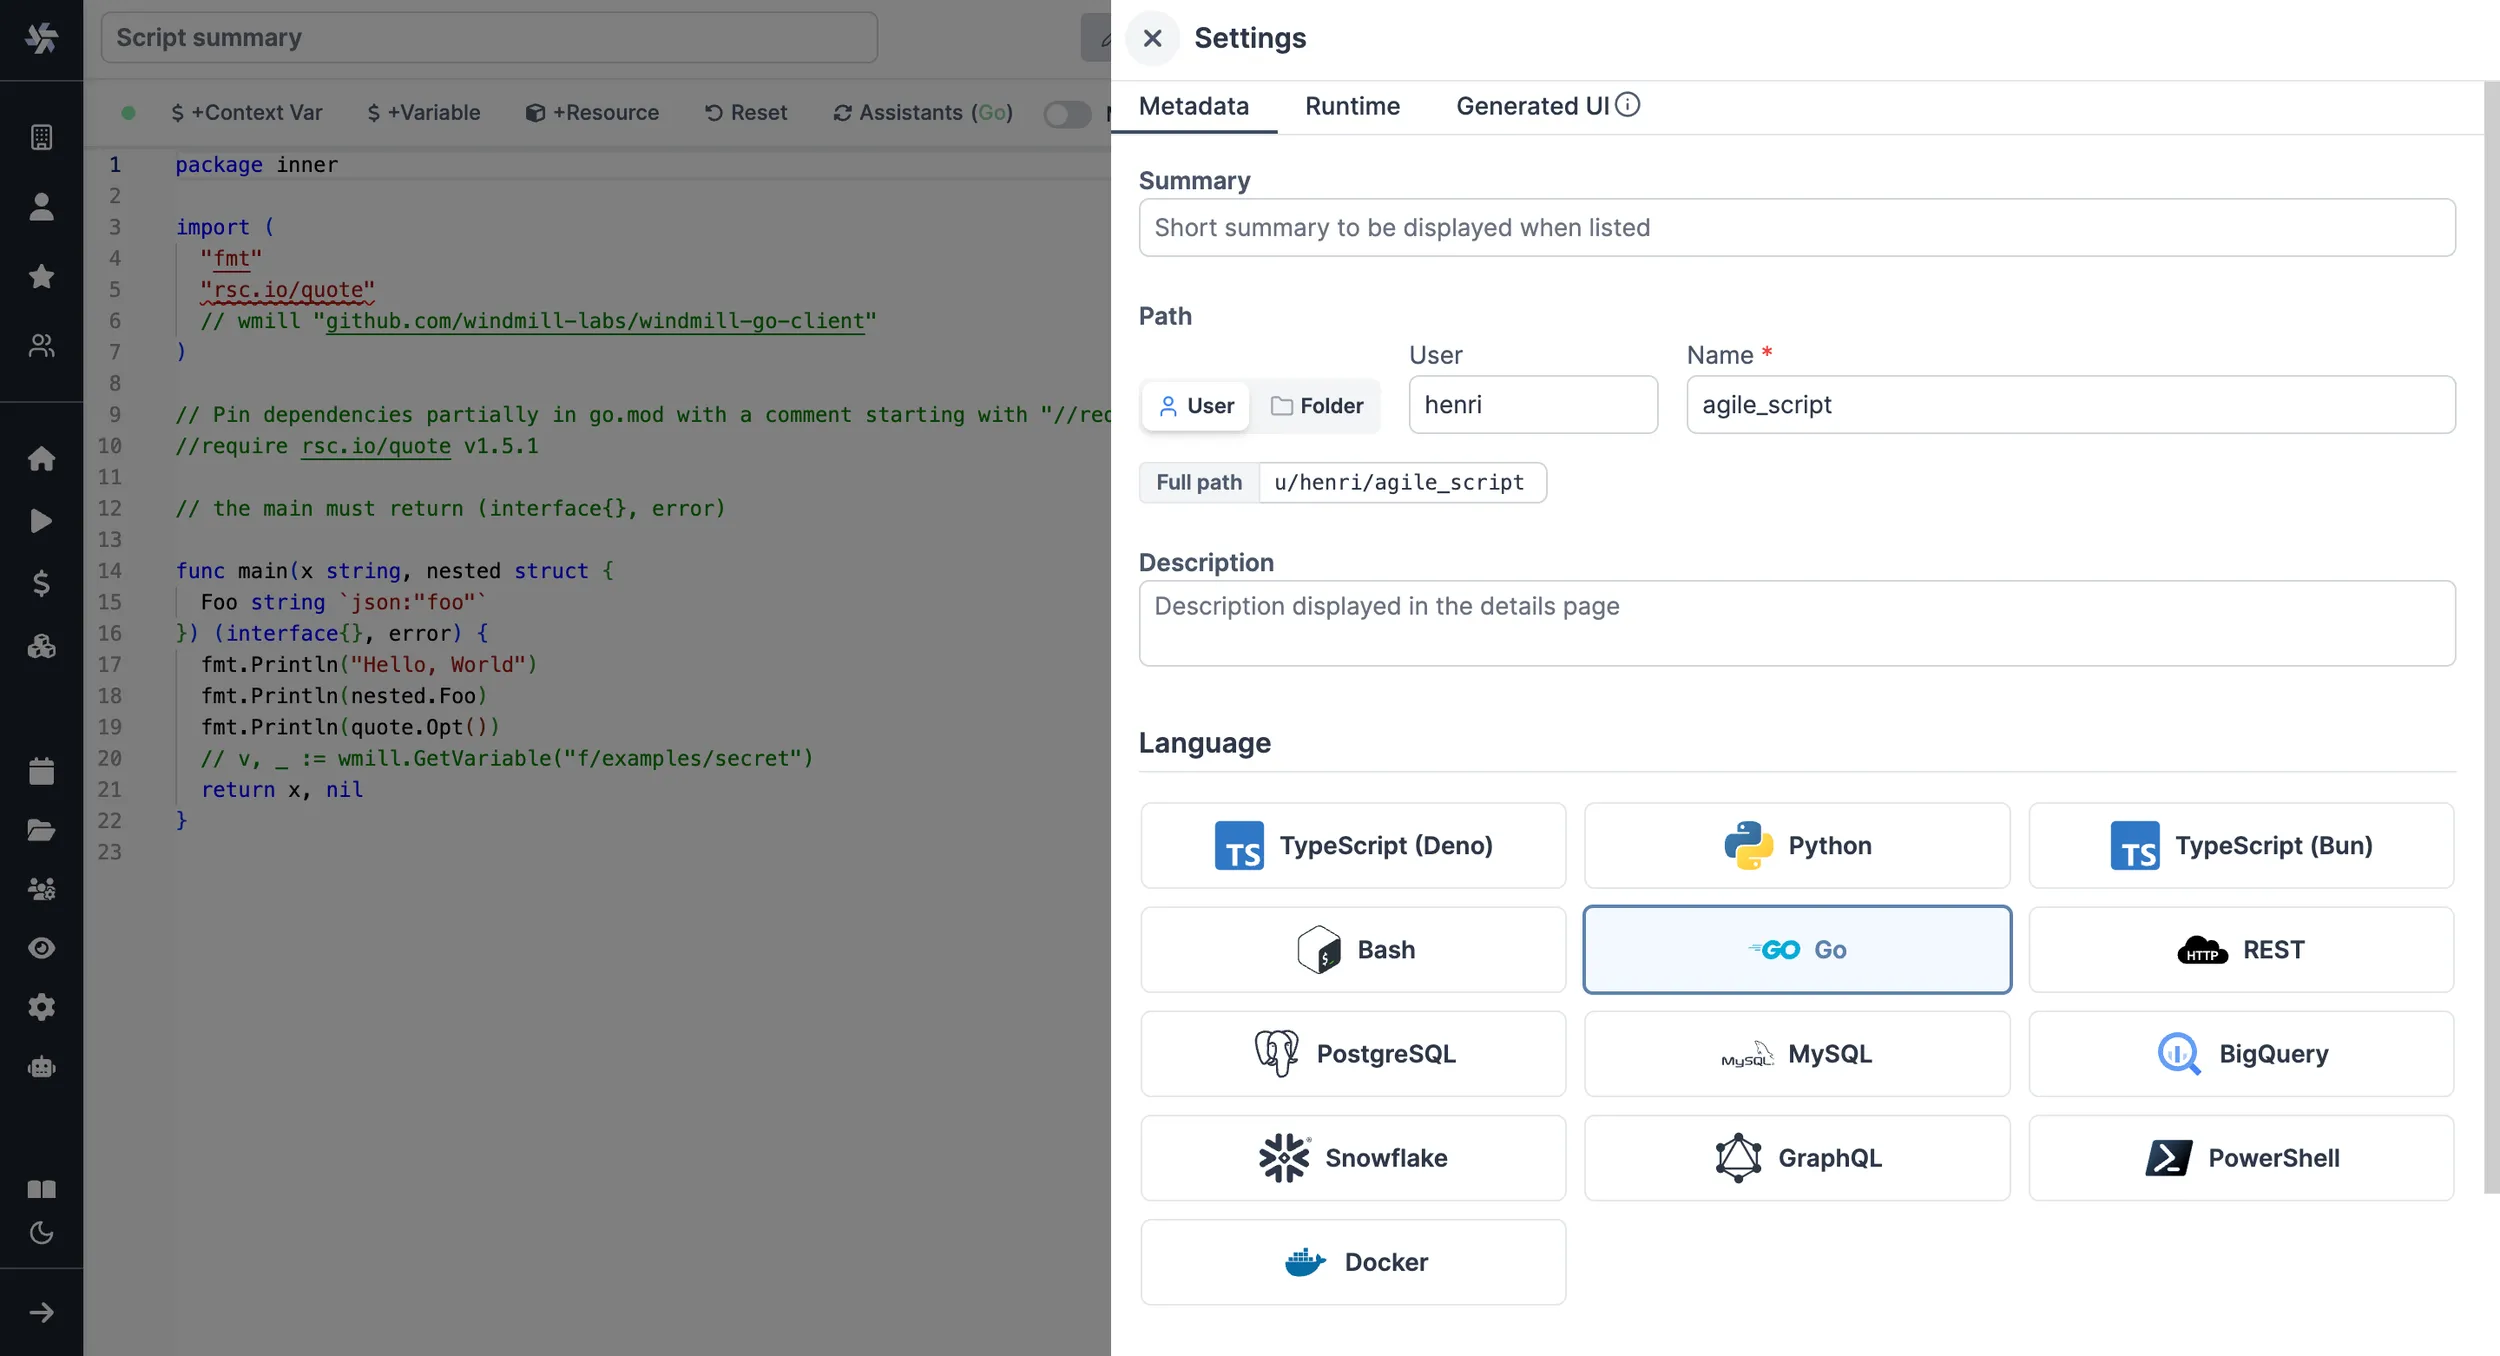
As part of the settings menu, each script has metadata associated with it, enabling it to be defined and configured in depth.
- Path is the Script's unique identifier that consists of the script's owner, and the script's name. The owner can be either a user, or a group (folder).
- Summary (optional) is a short, human-readable summary of the Script. It
will be displayed as a title across Windmill. If omitted, the UI will use the
pathby default. - Language of the script.
- Description is where you can give instructions through the auto-generated UI to users on how to run your Script. It supports markdown.
- Script kind: Action (by default), Trigger, Approval or Error Handler. This acts as a tag to filter appropriate scripts from the flow editor.
This menu also has additional settings, such as:
- Concurrency limits enable defining concurrency limits for scripts and inline scripts within flows to prevent exceeding the API Limit of the targeted API.
- Worker group tag to assign scripts to specific worker groups (such as nodes with GPU acceleration).
- Cache to cache the results for each possible inputs for a given time.
- Dedicated Workers to run the script on, to run the script at native speed. Only available on Cloud plans and Self-Hosted Enterprise edition and with Python and TypeScript.
Now click on the code editor on the left side.
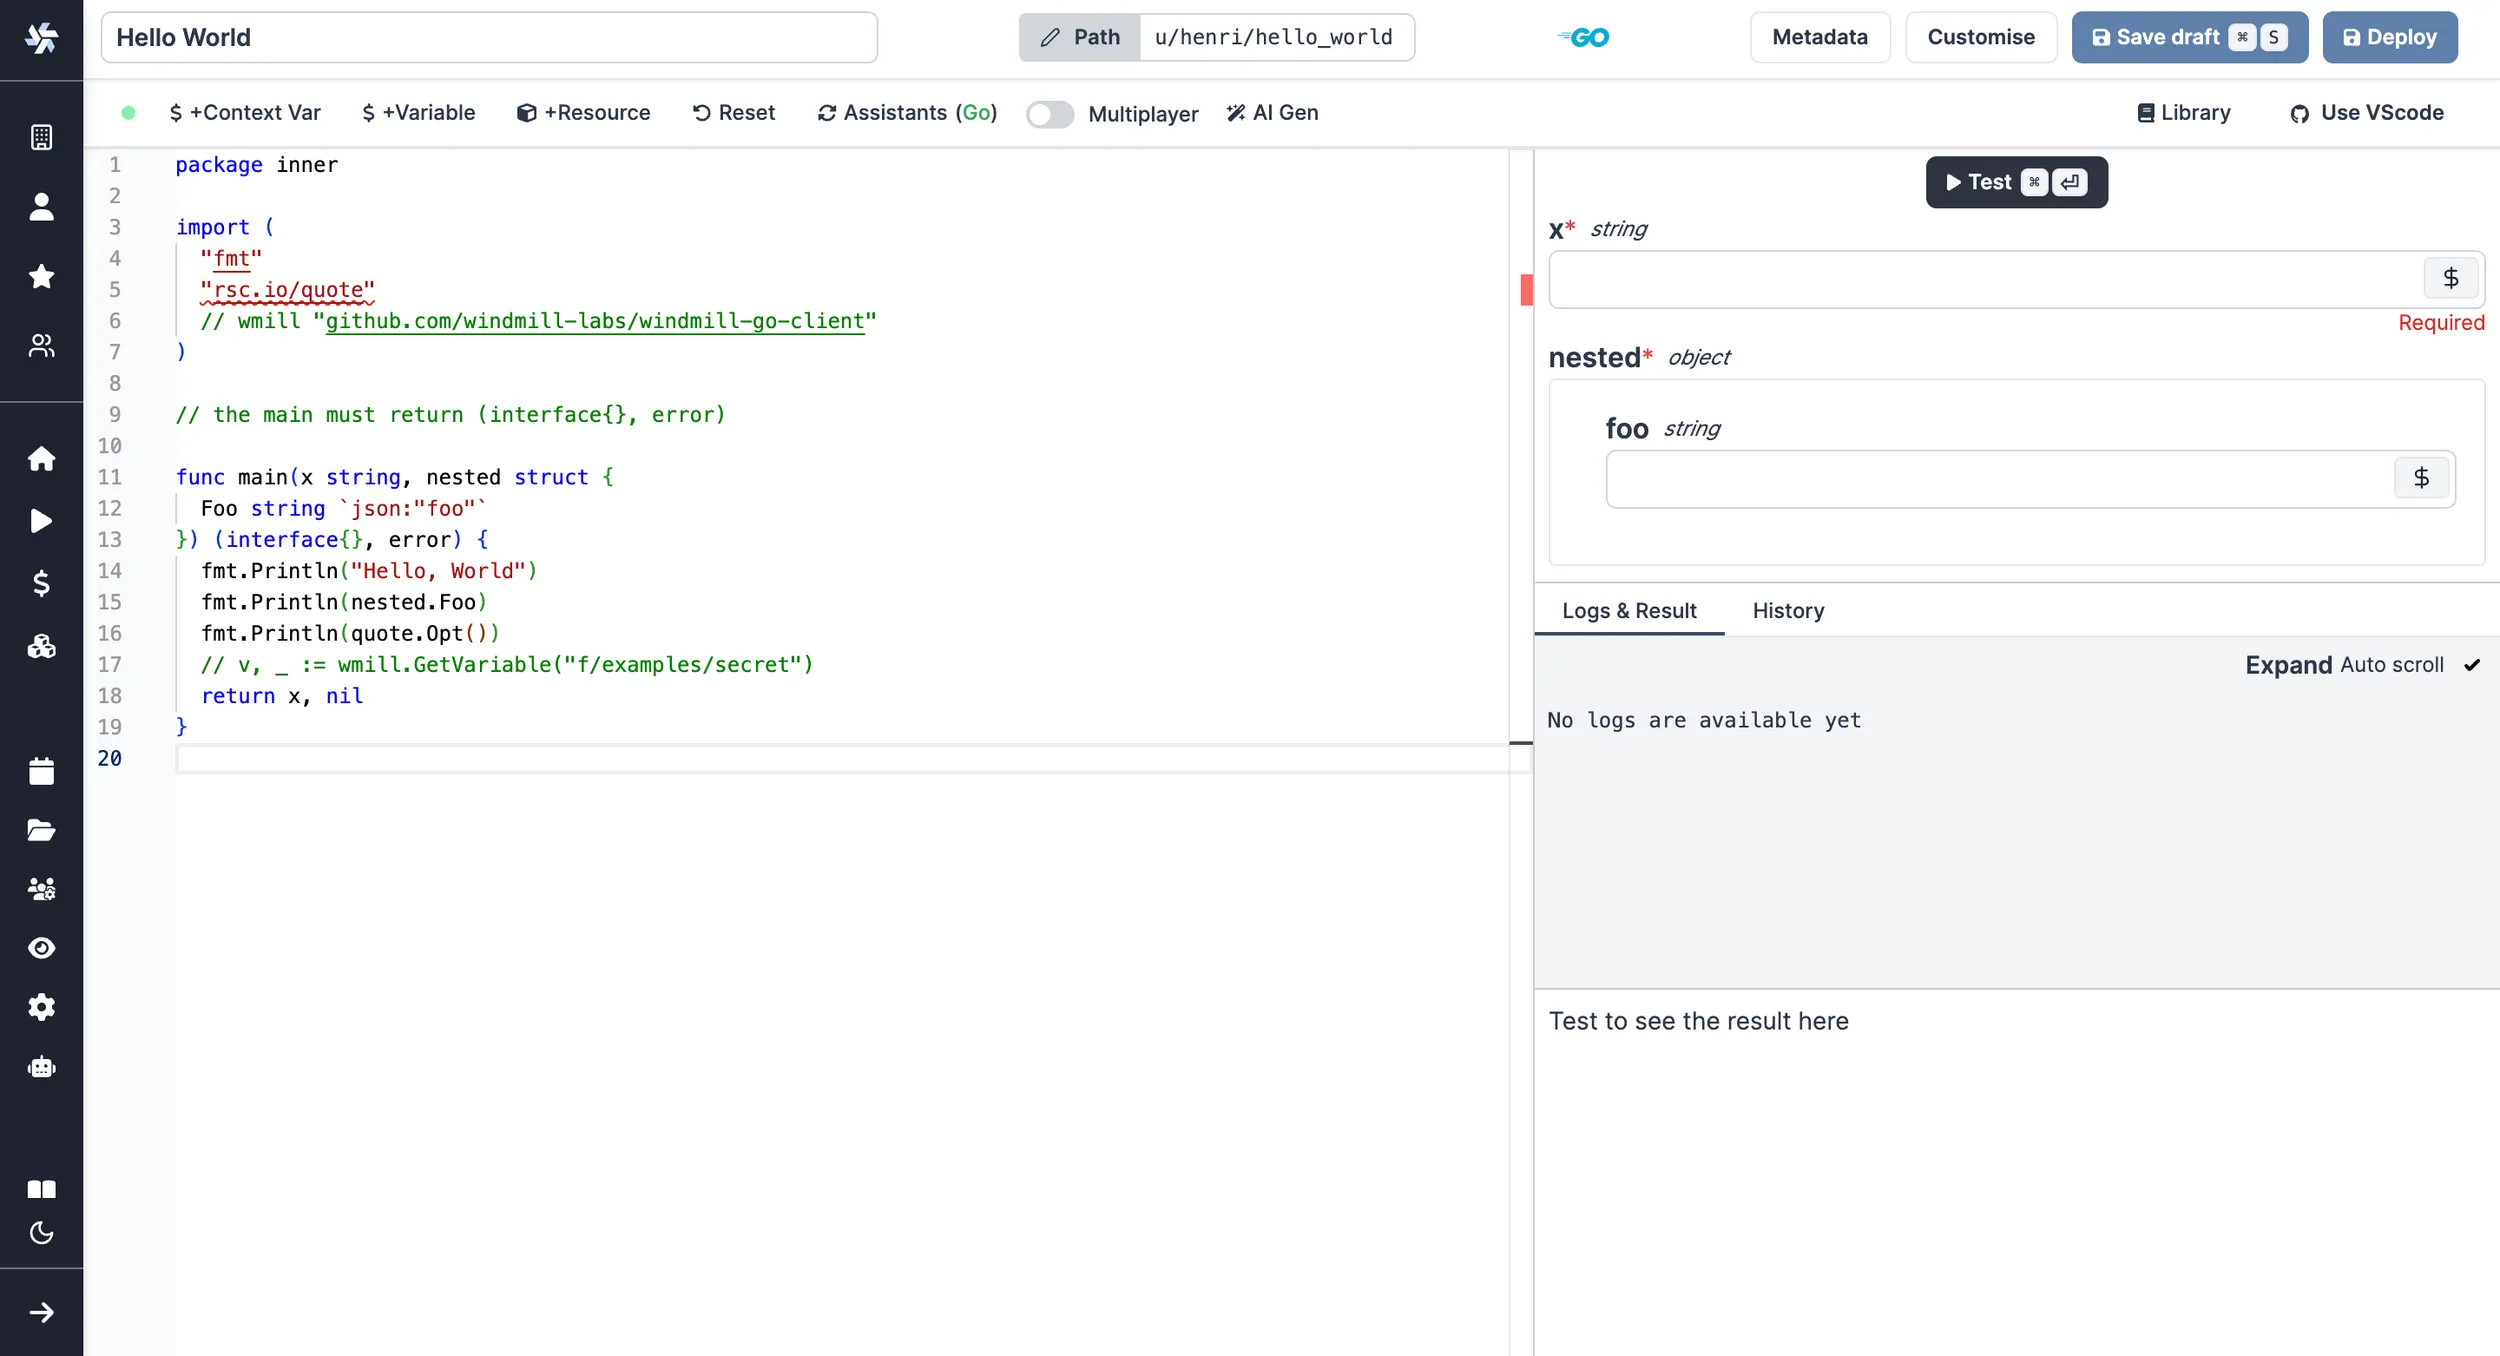
Code
Windmill provides an online editor to work on your Scripts. The left-side is the editor itself. The right-side previews the UI that Windmill will generate from the Script's signature - this will be visible to the users of the Script. You can preview that UI, provide input values, and test your script there.
As we picked Go for this example, Windmill provided some Go
boilerplate. Let's take a look:
package inner

import (
	"fmt"
	"rsc.io/quote"
	// wmill "github.com/windmill-labs/windmill-go-client"
)

// the main must return (interface{}, error)

func main(x string, nested struct {
	Foo string `json:"foo"`
}) (interface{}, error) {
	fmt.Println("Hello, World")
	fmt.Println(nested.Foo)
	fmt.Println(quote.Opt())
	// v, _ := wmill.GetVariable("f/examples/secret")
	return x, nil
}
In Windmill, scripts need to have a main function that will be the script's
entrypoint. There are a few important things to note about the main.
- The main arguments are used for generating
- the input spec of the Script
- the frontend that you see when running the Script as a standalone app.
- Type annotations are used to generate the UI form, and help pre-validate inputs. While not mandatory, they are highly recommended. You can customize the UI in later steps (but not change the input type!).
- In Go, the main function must return (interface, error).
The last import line imports the Windmill client, which is needed for example to access variables or resources.
In Go, the dependencies and their versions are contained in the script and hence there is no need for any additional steps.
Back to our Hello World. We can clean up unused import statements, change the
main to take in the user's name. Let's also return the name, maybe we can use
this later if we use this Script within a flow or app and need to pass its result on.
package inner

import (
	"fmt"
)

func main(name string) (string, error) {
	return fmt.Sprintf("Hello %s", name), nil
}
Instant Preview & Testing
Look at the UI preview on the right: it was updated to match the input
signature. Run a test (Ctrl + Enter) to verify everything works.
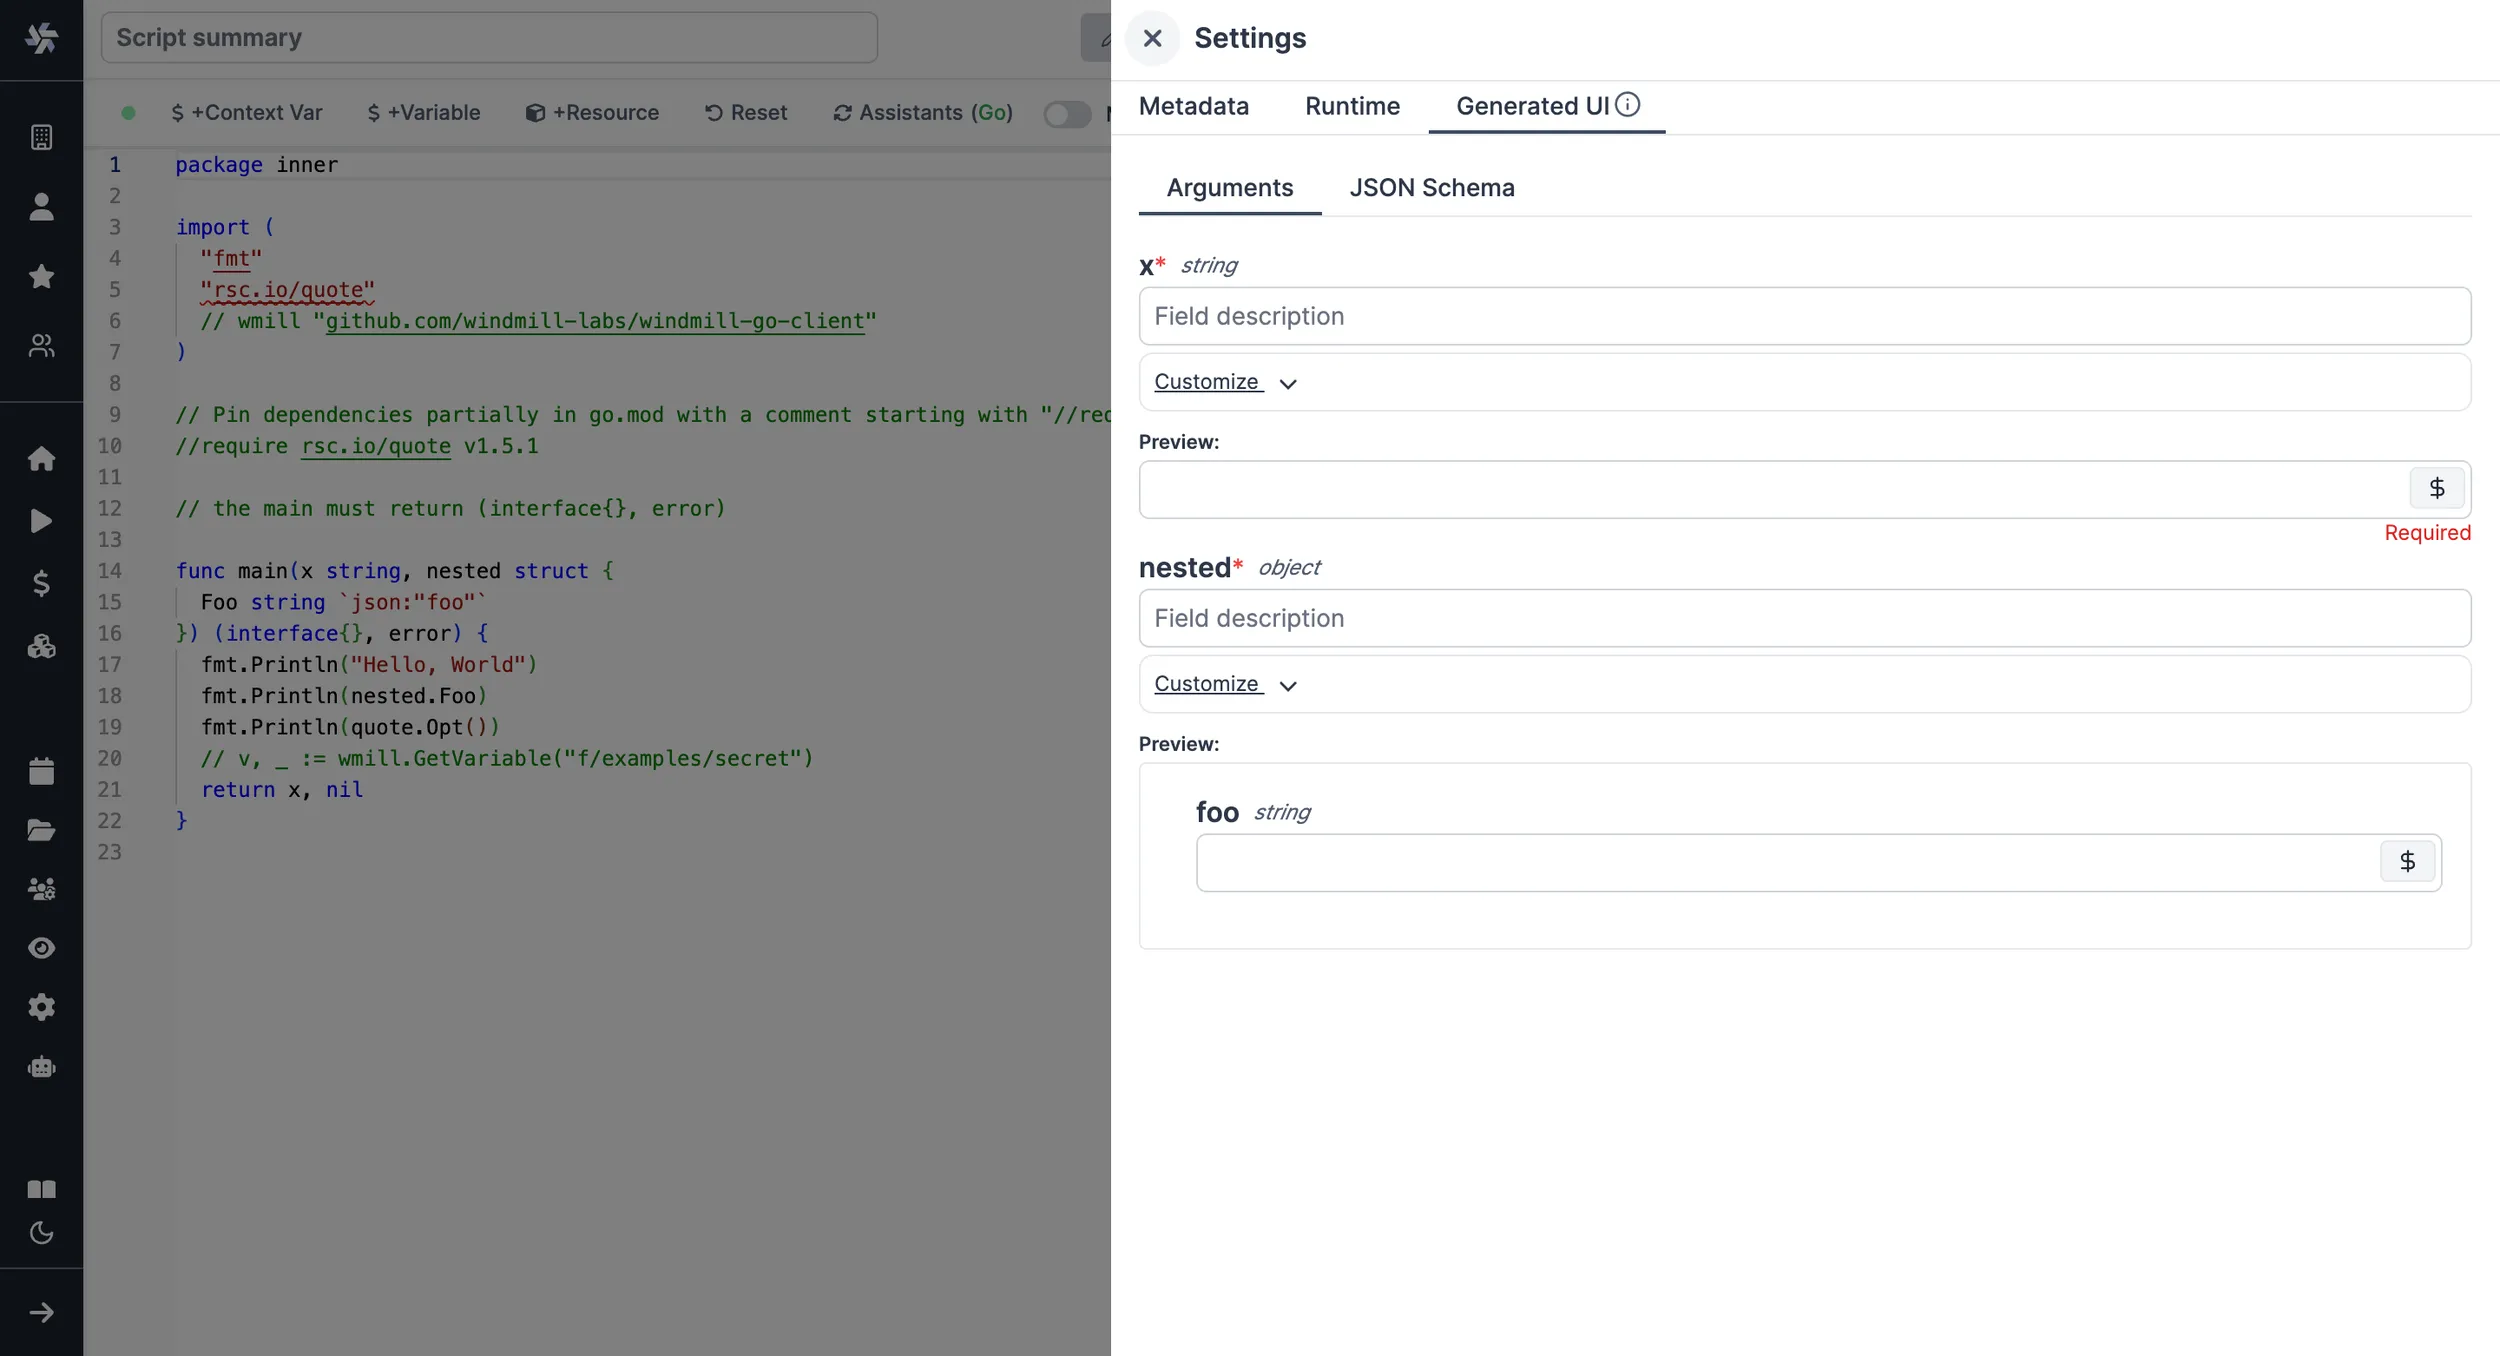
Now let's go to the last step: the "Generated UI" settings.
Customize UI
From the Settings menu, the "Generated UI" tab lets you customize the script's arguments.
The UI is generated from the Script's main function signature, but you can add additional constraints here. For example, we could use the Customize property: add a regex by clicking on Pattern to make sure users are providing a name with only alphanumeric characters: ^[A-Za-z0-9]+$. Let's still allow numbers in case you are some tech billionaire's kid.
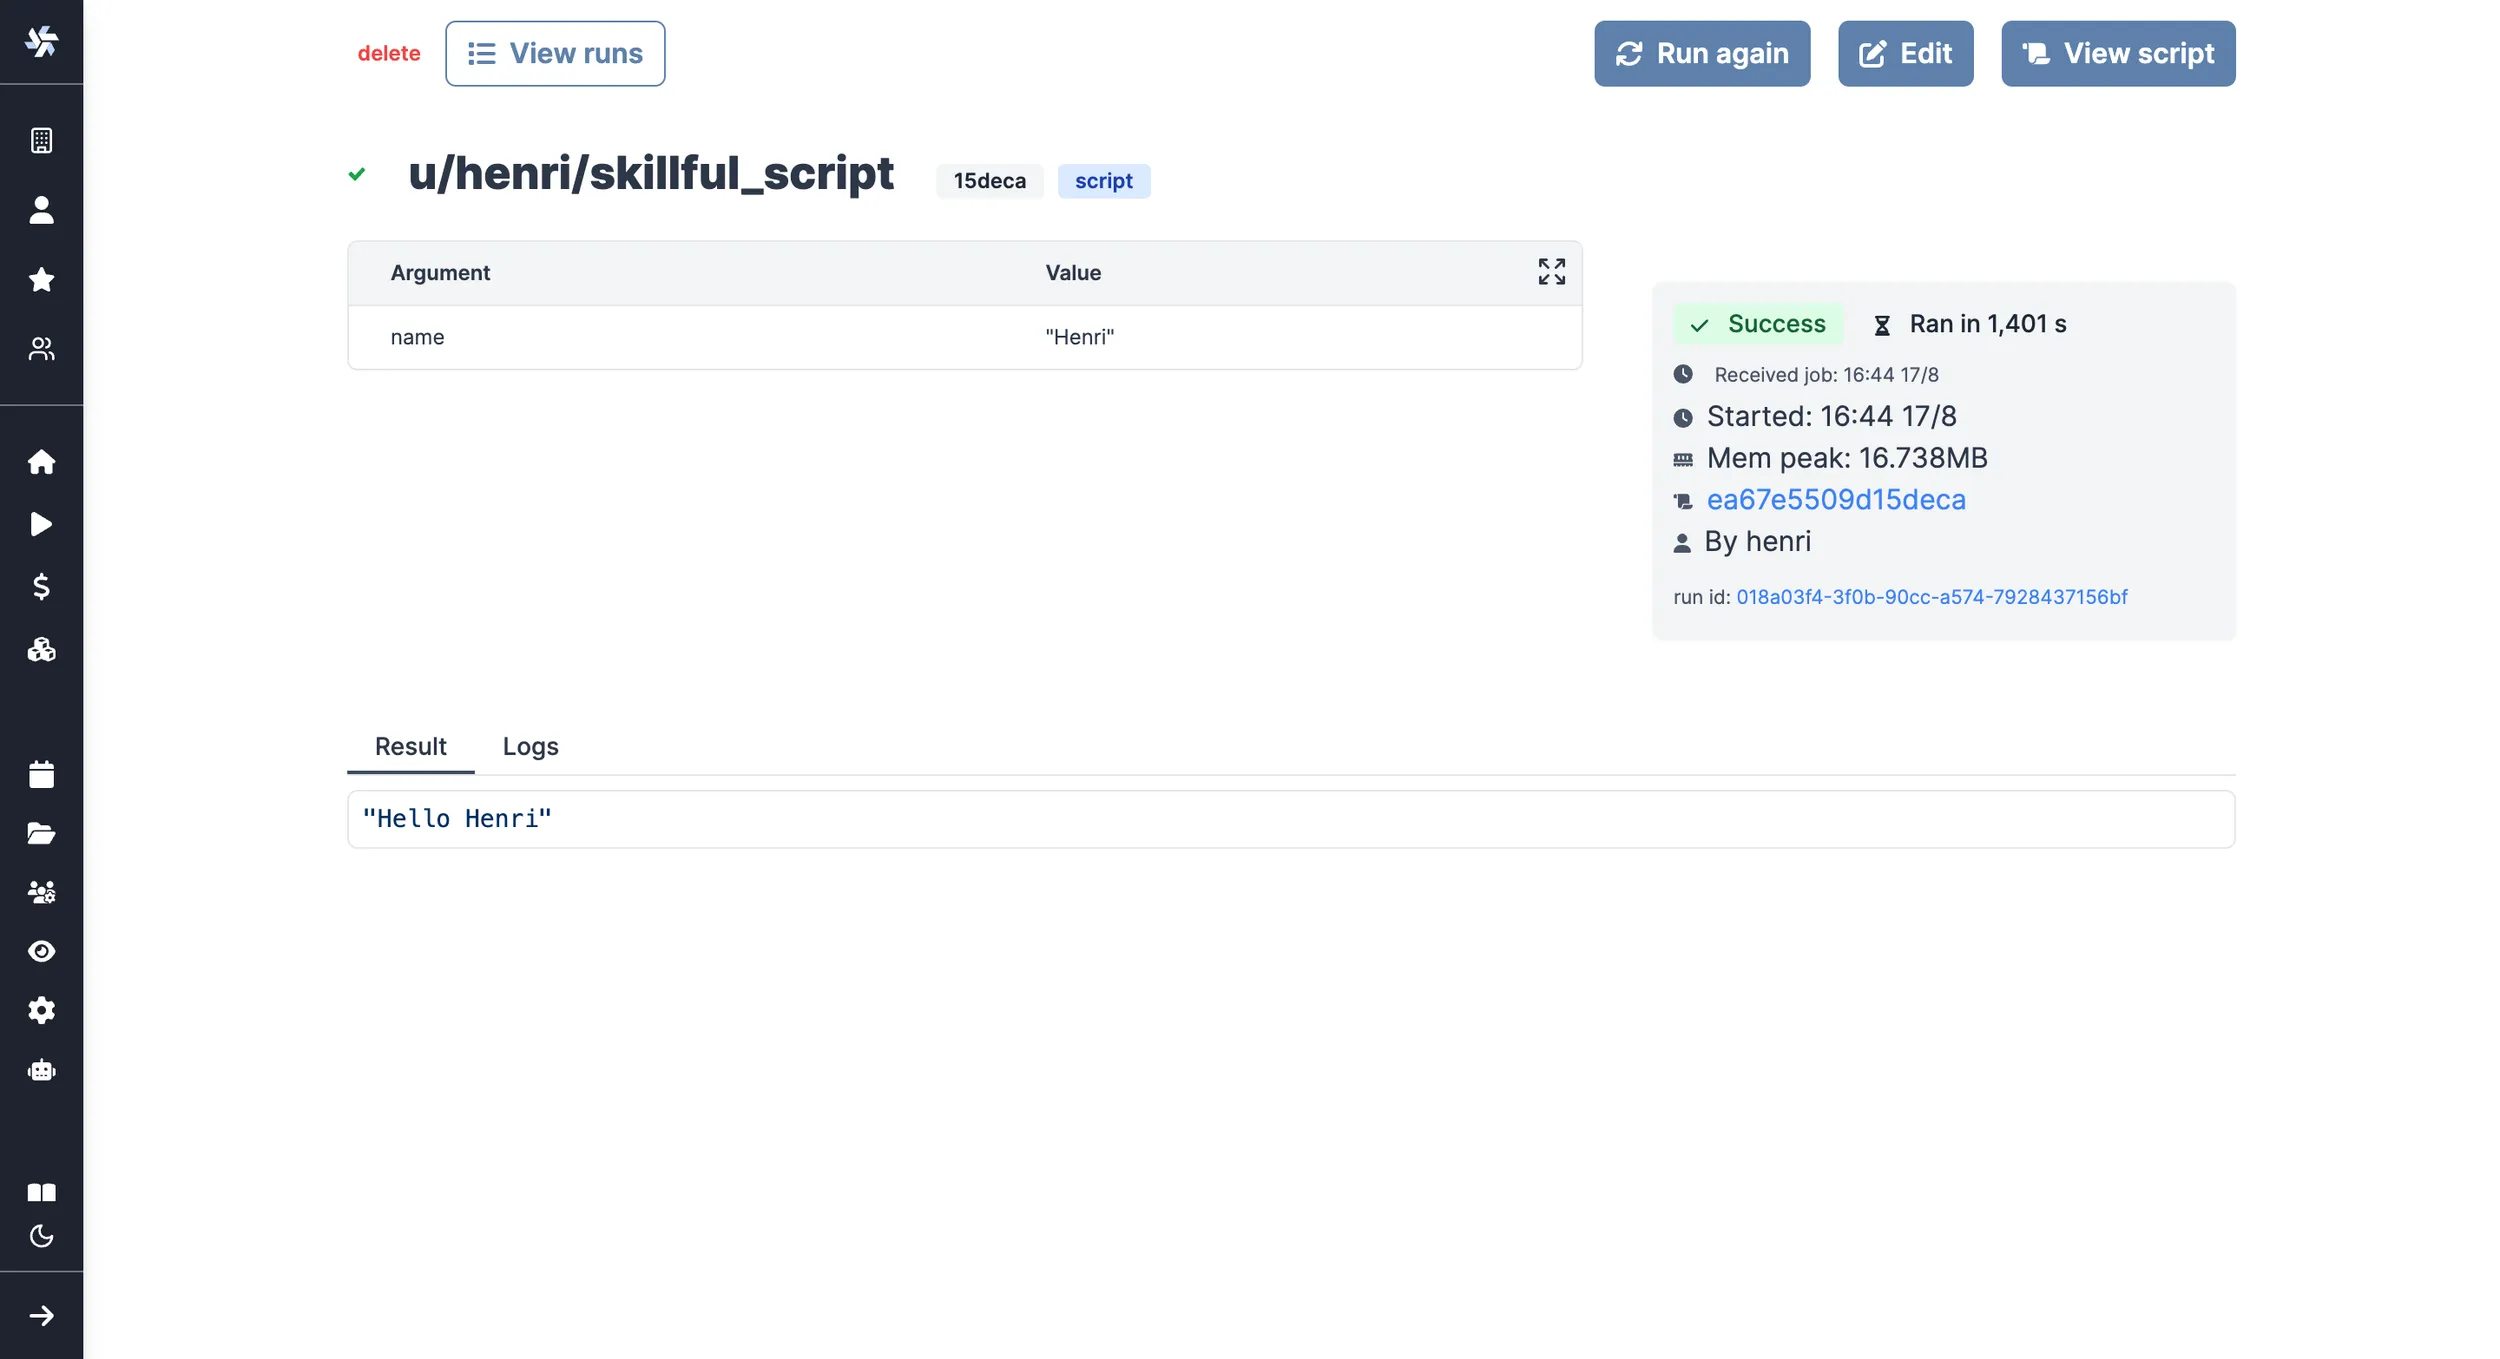
Run!
We're done! Now let's look at what users of the script will do. Click on the Deploy button to load the script. You'll see the user input form we defined earlier.
Note that Scripts are versioned in Windmill, and each script version is uniquely identified by a hash.
Fill in the input field, then hit "Run". You should see a run view, as well as your logs. All script runs are also available in the Runs menu on the left.
You can also choose to run the script from the CLI with the pre-made Command-Line Interface call.
What's next?
This script is a minimal working example, but there's a few more steps that can be useful in a real-world use case:
- Pass variables and secrets to a script.
- Connect to resources.
- Trigger that script in many ways.
- Compose scripts in Flows or Apps.
- You can share your scripts with the community on Windmill Hub. Once submitted, they will be verified by moderators before becoming available to everyone right within Windmill.
Scripts are immutable and there is an hash for each deployment of a given script. Scripts are never overwritten and referring to a script by path is referring to the latest deployed hash at that path.
For each script, a UI is autogenerated from the jsonchema inferred from the script signature, and can be customized further as standalone or embedded into rich UIs using the App builder.
In addition to the UI, sync and async webhooks are generated for each deployment.